RICE PAPER TREATS

A twist on Spanakopita

I am currently visiting family in Chicago. This visit always turns into a food-a-thon, and that is great fun. While going through the pantry looking for something, I happened upon a sleeve of large rice paper wrappers which had seen better days. We had had a salad the night before and there was some fresh spinach left. I had to do a run to the grocery store and picked up some curly kale for another salad. While putting things away into the fridge, I saw a half block of feta and some unopened dill and realized that there was enough of everything to make filling for spanakopita and figured I would try it with the rice paper bits for Happy Hour nibbles. It worked. Lo and behold, I give you rice paper treats.

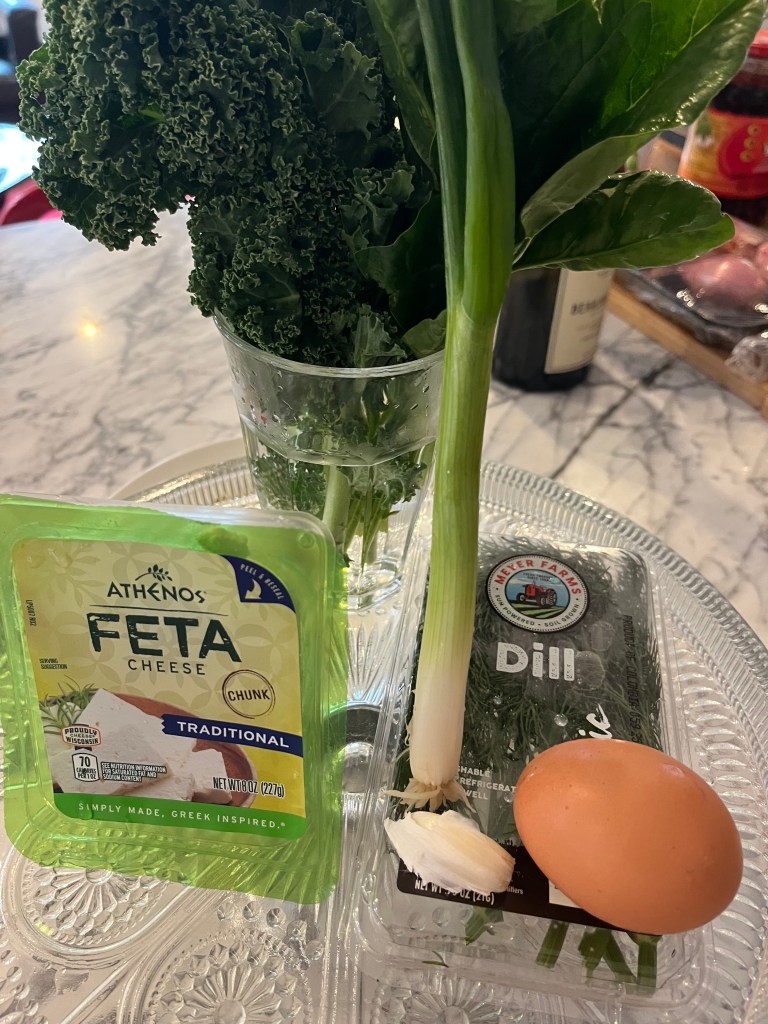
The fixings. This made 12 squares.

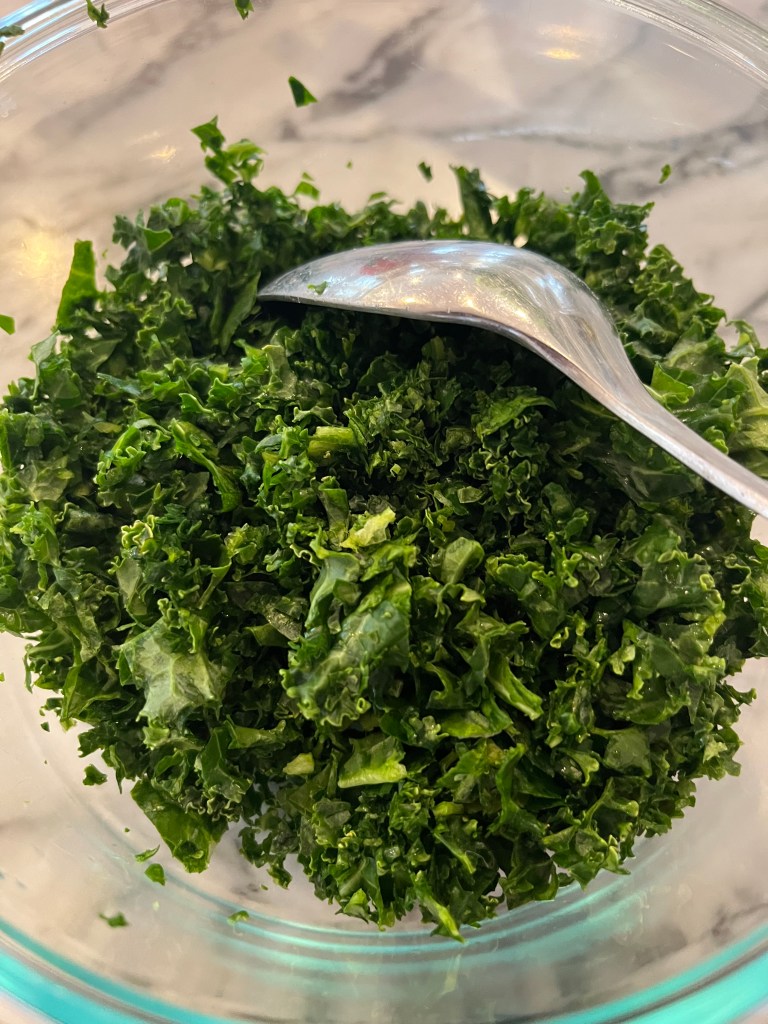
First, I chopped the spinach and kale really finely. You can probably do the same in a food processor, but I didn’t want to take out another appliance. Get the greens as fine as you can and then squeeze out as much liquid as you can to get a dry mix.

Chop the scallion, garlic, and dill and add to the spinach/kale bowl. Season with salt and pepper to taste and mix.

Add the egg and stir all together.

Crumble the feta (use as much as you want, I used about 1/4 block) and add to the entire mix. Stir to combine. If you want to taste, make a small patty and cook to make sure you have all the seasonings ok. A grate or two of nutmeg would go really well with the greens, I forgot to add but you will do better.

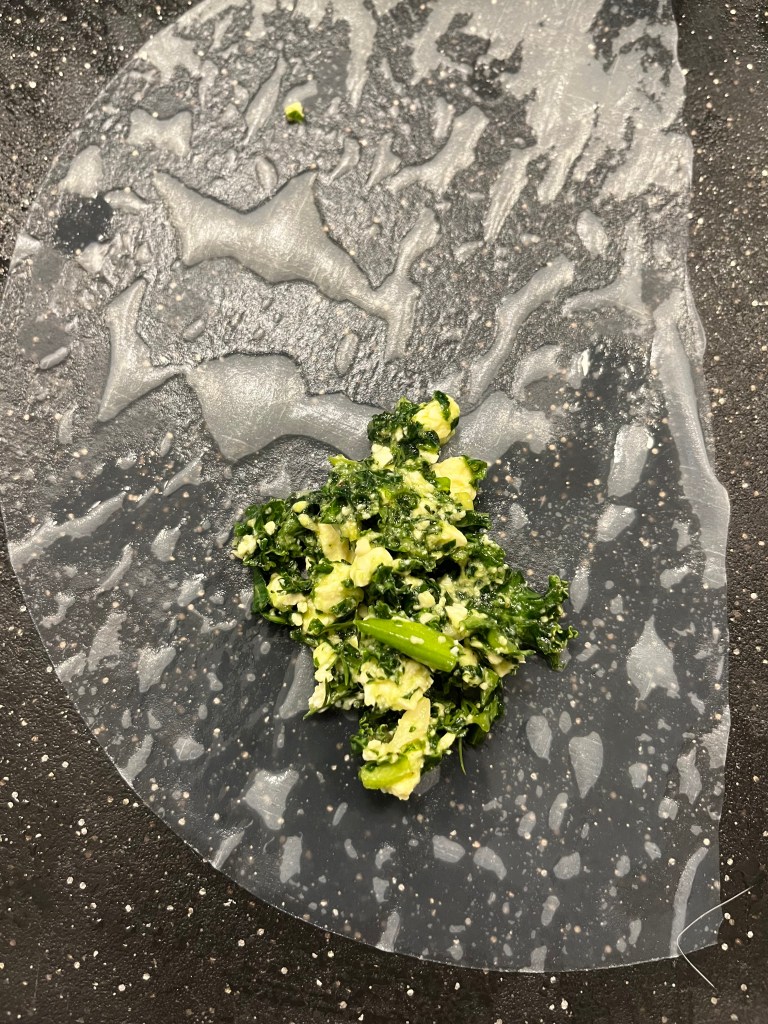
Now, set a dinner plate aside and add some water. Take a second dinner plate or a tray and spray or brush with oil. Take a rice paper sheet and place on the water plate for a few seconds. Flip the sheet and let sit for another few seconds. Take out and place on your board. Add a spoonful of the mix to the part of the sheet closest to you like so.

You can see that the paper is damp. That is what you want. The damper it is, the easier it is to roll. Starting at the bottom, fold the paper over the mix, then fold the two sides over and roll and flatten, much like you would do with a burrito. Place on the oil plate. Repeat until you have finished the filling or run out of paper. I forgot to take a foto of the wrapped square, but you will see in the finished product below.

Oil a non stick pan and place the squares over medium heat. They will get crispy and the interior will cook. Flip after a few minutes, that depends on how brown you want the exterior or how many people are hovering over you as you cook. I made 12. As I was taking them out of the pan, they were eaten. I had to move fast to get a finished picture!

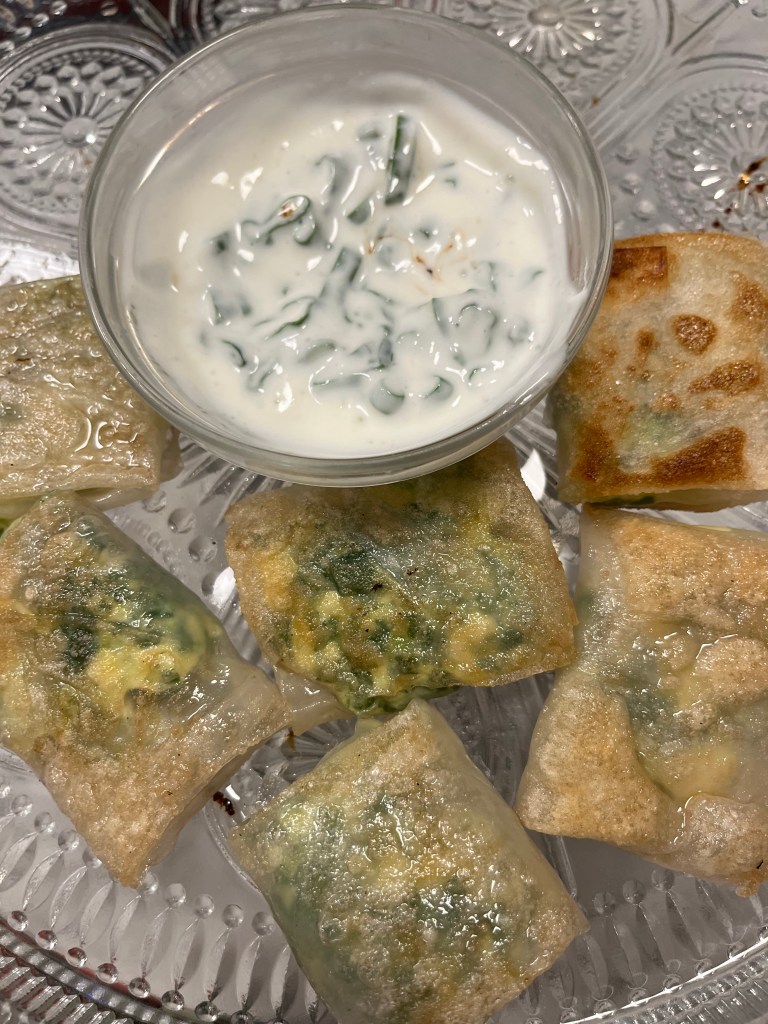
I made a quick dip with some yogurt and the scallion tops that were left and that was it!

Why do I love this and why will I make it again? It’s easy. It tastes good. I always have rice paper sheets and you should too, they can be used for so many things, cooked and uncooked! Everyone loves hot crispy things. And it is so much easier than making with phyllo because you do not have to wait 24-48 hours for the phyllo to defrost. You don’t have to keep the rice paper sheets covered while you work. It’s gluten free for your gluten free friends. It took about 15 minutes to put the whole thing together including taking fotos to show you. Did I say it tastes good? I hope you try it. If you do, let me know how it goes!

Yotem Ottolenghi, the master of many ingredients, has published a new book called SIMPLE. It is a beautiful text and in fact does have many simple and ingredient pared recipes. Among them, I found this, and with the preponderance of beautiful mini cauliflowers of many colors still in the green markets, I was inspired to make it. It is indeed simple: ingredients-the aforementioned cauliflower, a Tablespoon each of butter and olive oil, and flaky sea salt, Maldon if you have it. He adds a green dipping sauce, but I found the sweetness and crunchiness of the cauliflower more than enough (I did serve some Greek yogurt alongside because I had a purple cauliflower and it looked so beautiful). I made this with a mini sized head, but the recipe works for any size. Here are the directions. Preheat oven to 375 degrees. Rinse the cauliflower, trim the stem to flatten it, but do not remove the leaves (they get crunchy and delicious in the roasting process) and place in salted boiling water head down for 5-6 minutes. Don’t worry if the head is not completely immersed. After 6 minutes, remove and place head down in a colander to drain for 10 minutes. Place drained and cooled head on a sheet pan or an oven proof dish head side up (you can use the dish for serving) and top with butter, olive oil, and a sprinkle of the the sea salt. Roast in oven for 1 hour to 1 1/2 hours depending on the size of the head. Remove from the oven and let cool. Sprinkle with a bit more salt and pepper. Serve as is either on the sheet pan or on the dish. Just break off the florets and eat. It is crunchy on the top, and creamy in the middle, the leaves get potato chip like, just a great vegetarian lunch or dinner side. And so much more inventive than the tiresome cauliflower rice.

Another 3-4 ingredient nibble for really hot and muggy days, like today. Serve with an icy glass of Pernod or a white wine as long as it is cold. Your ingredient list? some good Greek yogurt (or labney if you have it), some chopped herbs: parsley, chives, thyme, whatever you like, salt and pepper and other dried spices to your taste and or liking, a splash of extra virgin olive oil, and some toasted walnuts for crunch. Serve with gluten free crackers (like Mary’s) or pita. And the recipe is? In a bowl, combine yogurt and chopped herbs along with salt and pepper and other spices if using and spread mixture onto a plate. Top with olive oil and toasted nuts. Done. If it is just too hot to toast the nuts, don’t bother. It will still be yummy. Just make sure your libations are chilled. Baby, it’s hot outside.

IMG_0851

Roasted beet and yogurt spread with pita. Can be done ahead. Allow time for roasting beets. Easy. You will need 2 medium sized beets, 2 cloves of unpeeled garlic, vegetable oil (or canola or olive), 1/4 cup plus 1 tablespoon walnuts or nut of your choice, 1 tablespoon of walnut or another nut oil, even olive oil if that is what you have, the juice of a lemon, and salt and pepper to taste. For finishing and serving, pita bread cut into triangles and plain Greek yogurt or Labne–more on that in a minute. First, wrap the beets and garlic cloves in aluminum foil with a bit of the vegetable oil and salt and pepper. Roast at 400 degrees until the beets are softened-about 45 minutes. Let cool and peel both beets (maybe with gloves?) and garlic. While beets and garlic are roasting, toast the nuts being careful not to burn them. Chop when cooled. Combine the beets, garlic, and 1/4 cup nuts and put into food processor or chop finely by hand if food processor is not available. Add walnut oil, salt and pepper to taste and lemon juice to your liking. To finish, spoon mixture on a flat plate and swirl in yogurt or Labne. Labne has a similar taste and texture as Greek yogurt and if you can find it, give it a try. It can be found in the refrigerator section of your grocer. It can also be found in Middle Eastern markets if you live in an area where they exist. Top with last tablespoon of chopped walnuts and drizzle with a bit more of the nut oil if you wish. Serve with pita triangles and a glass of your favorite libation.