It is a beautiful Saturday here in quarantined Brooklyn. Totally Spring. And in a sign that some normalcy is trying to return, my dry cleaner was opened so I was able to ransom garments that I dropped off a month ago, like having a new wardrobe. Our Greenmarket is open on Saturdays as well, so I walked up to see if anything was available. Lo and behold, green things are starting to appear as nature does its thing with or without face masks.
One of the vendors had beautiful bunches of broccoli rabe and for the first time in 6 weeks I had a craving for something that wasn’t a potato chip or a bottle of wine. This has to be the easiest, freshest, and tastiest thing to make on the spur of the moment.
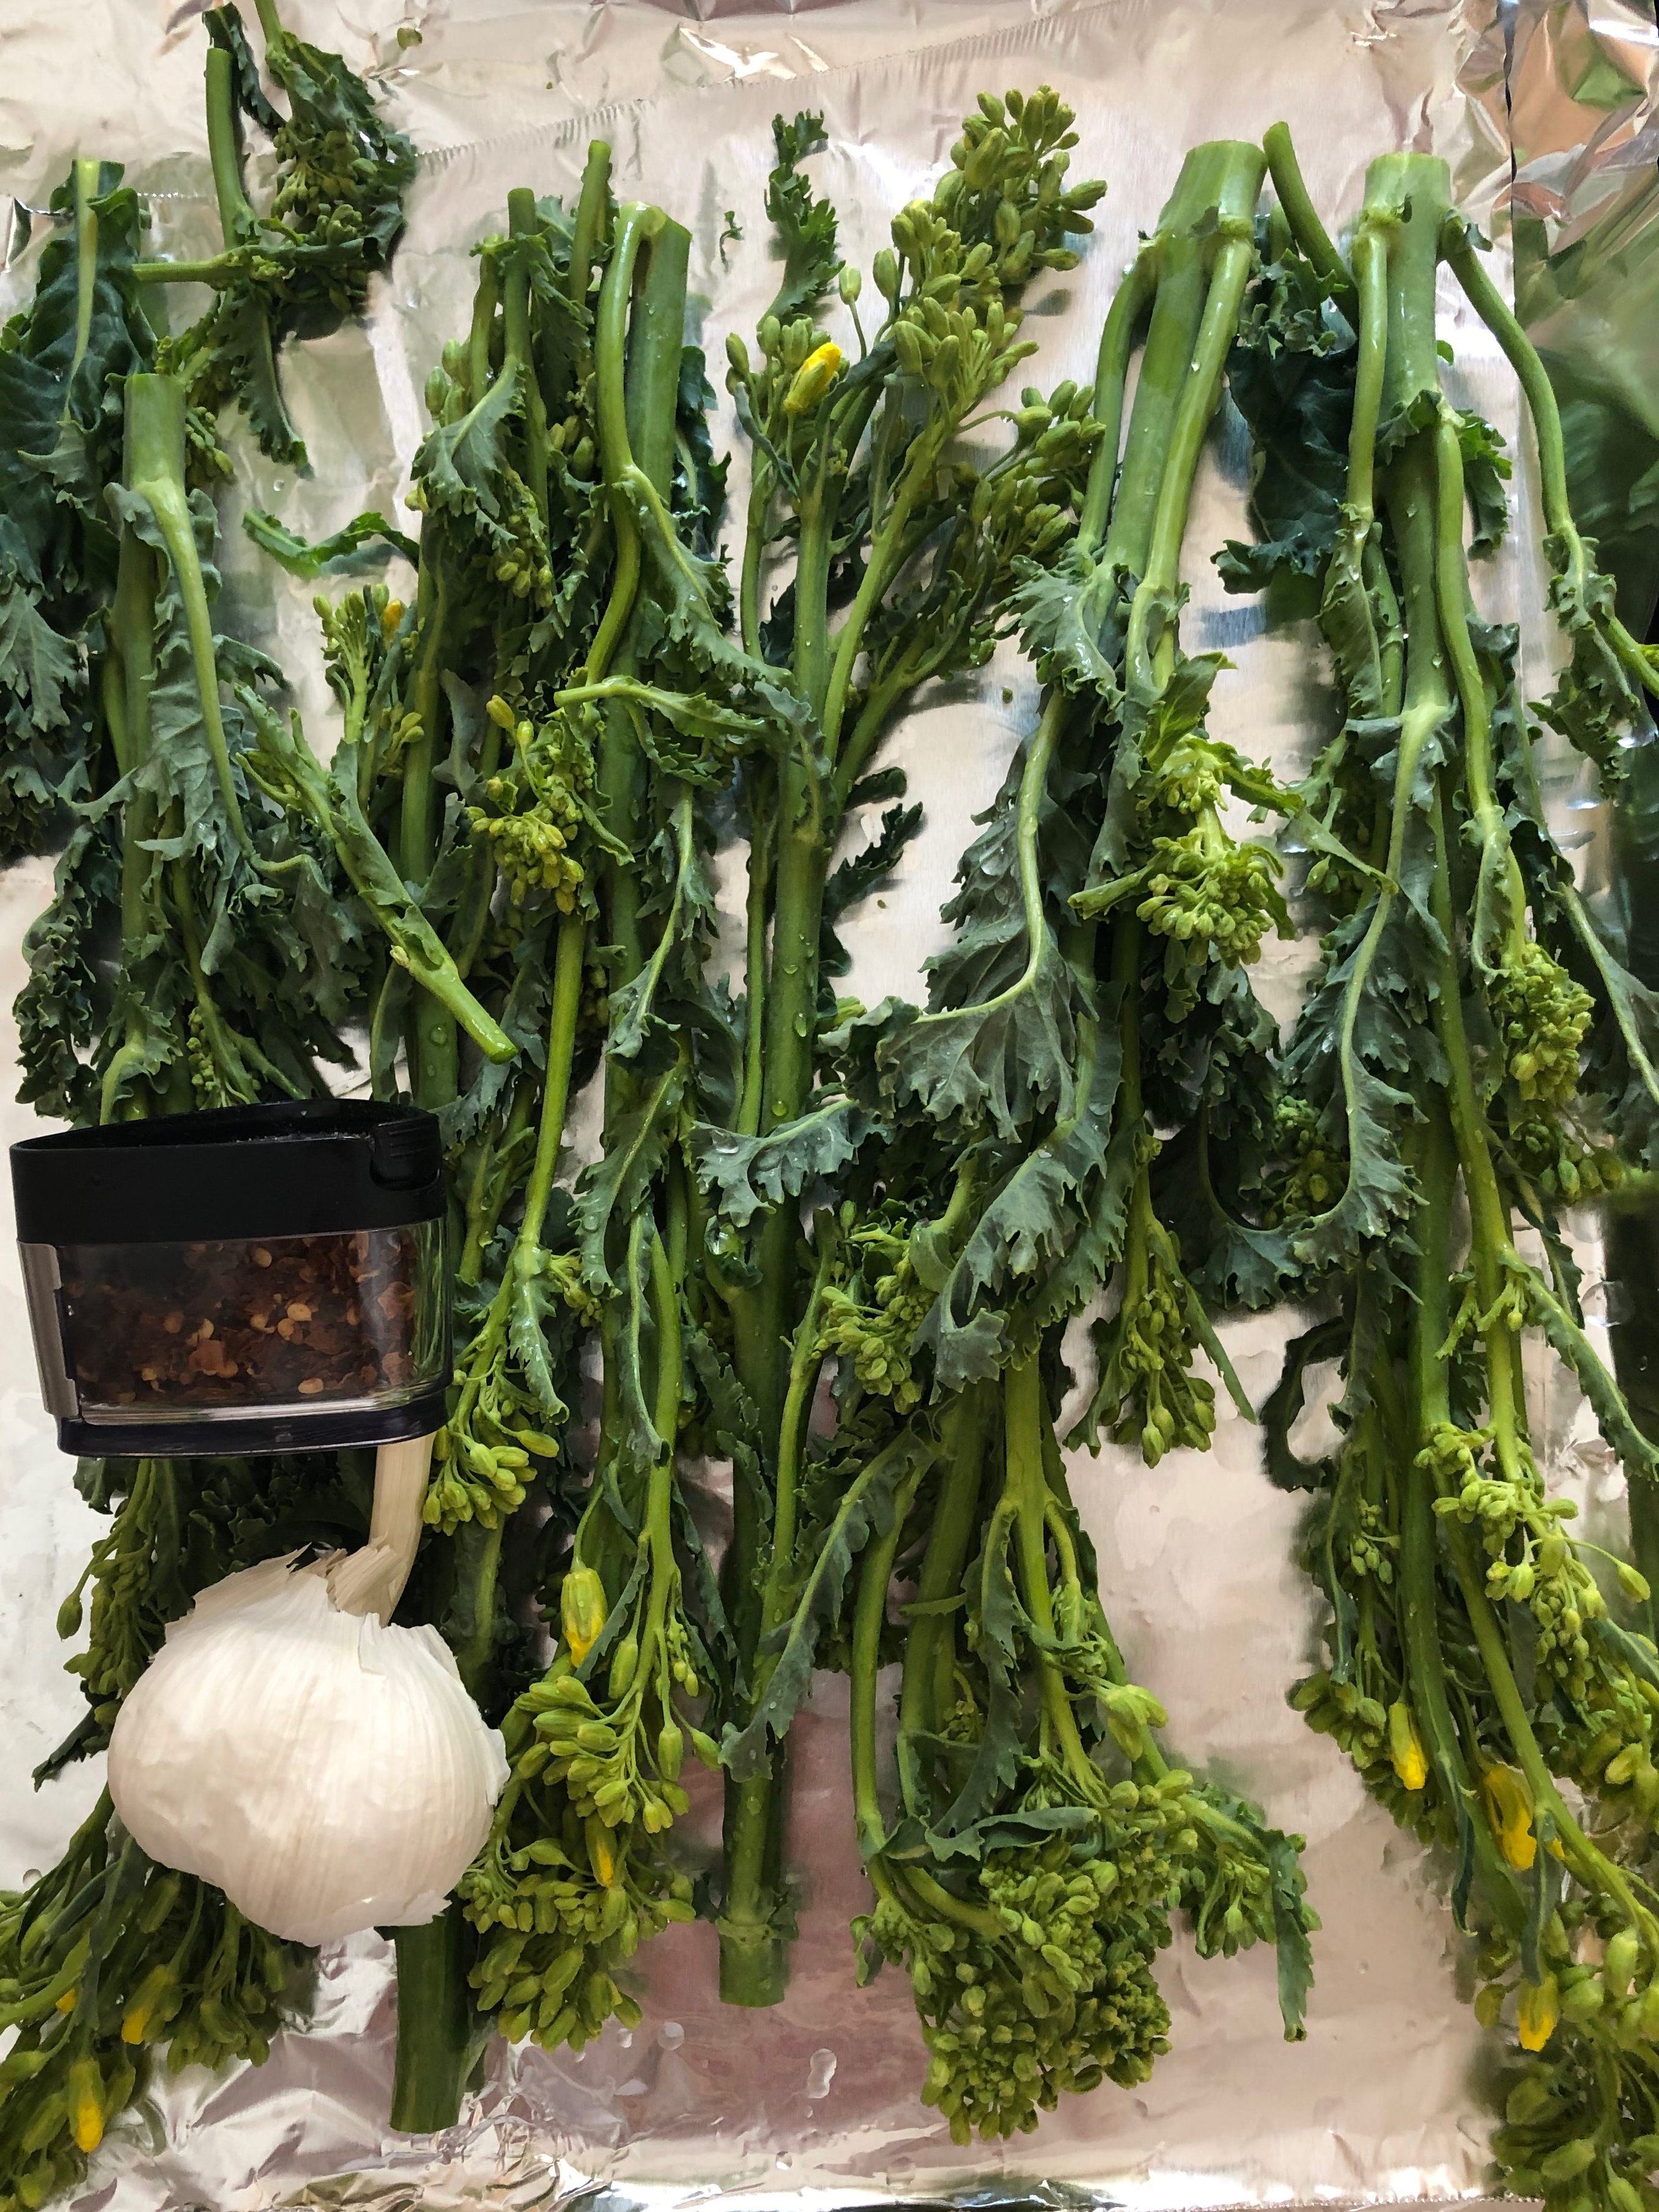
So before you I have presented the ingredients. Rapini (or broccoli rabe), garlic, crushed red pepper. You will also need olive oil and flaky sea salt to taste. Everything is QB (quanta basta, or as much as you need or want). First blanch the rapini in boiling water for about 5 minutes. This will soften the stems. Refresh in ice water and drain. Heat oven to 400 degrees. While oven is heating, slice the garlic as thinly as you can. Cover a rimmed sheet pan with aluminum foil (read easy cleanup) and place the rapini on the pan alternating stems and tops for even cooking. If necessary, use two pans, you don’t want to crowd the pan. Add the olive oil, the shaved garlic, the crushed red pepper, salt to taste, and toss. Roast 10-15 minutes. That is all there is to it. If the stems are still tough, cut them from the tops, and place back into oven covered with some aluminum foil to finish. Add lemon juice if you want, or a splash of red wine vinegar. That’s the healthy part.


When I was growing up, my grandmother would make me a sandwich on our Sunday visits. Kaiser roll, some pork cracklings from the rendered fat back used to fry the meatballs for Sunday gravy, and some broccoli rabe. As I was roasting the rapini, I thought of that dish. I had some bacon in the fridge which I chopped down into small pieces and fried. Dipped a Martin’s potato roll into some of the bacon fat, added a few pieces of crispy bacon, a few slices of shaved pecorino cheese, some of the garlic slices from the rapini and toasted my grandmother. Not so healthy, but oh so delicious.
Other things you can do: chop it, add some of the cooking oil and bacon and toss with pasta; top with fried egg; serve at room temperature as a side or salad adding some lemon zest; chop and add to omelettes.
So grab your mask, go for a walk, enjoy the day, look for the rapini, and be grateful for another spring.