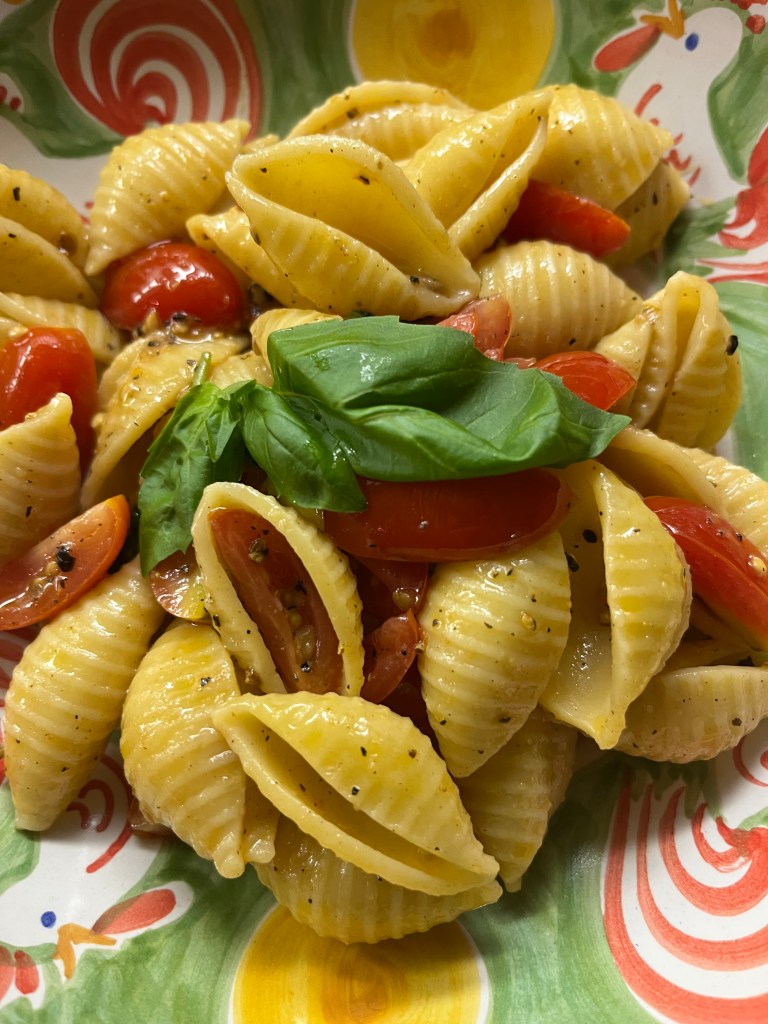
I had not planned to write this, hence the paucity of photos but with the heat wave upon us, I changed my mind. This is the easiest pasta sauce imaginable. It requires a minimum of ingredients and even those can be switched out to suit the taste of the chef. I had a box of grape tomatoes, some basil and a box of medium shells. Red wine vinegar, olive oil. That’s it.
dDirections? 1/2 hour before you plan to put the water on to boil and depending on whether you are using cherry or grape tomatoes, cut the tomatoes in either half or quarters. Add to a bowl along with a splash of red wine vinegar and salt and pepper. Allow the mixture to sit. Boil the pasta according to box instructions. Drain. Add olive oil to tomato mix and toss. Add pasta and basil and eat. Can even be served at room temperature. If you want, you can add things like chopped anchovies, chopped capers, chopped onions, but all that requires more work and when you are too wilted to cook, chopping just becomes another heat producer. Swap out tomatoes for grated zucchini if that is your pleasure. You are only limited by your imagination!
Isn’t this a picture? I prefer the shape pastas to the long pastas for this recipe. And I love the way the shells capture the tomato pieces. Enjoy!
This is a great quick preparation for carnivores, pescatarians, vegetarians and vegans. Gluten free. Dairy free. And in the next month or so, they will be everywhere! Can go on toast, pasta, fish, meat, in eggs….getting the picture? 4 ingredients unless you really want to jazz it up. I bring you ZUCCHINI BUTTER. To make, you will need
Note. One of the ingredients is a piece of equipment. That everyone has. In some way, shape or form.
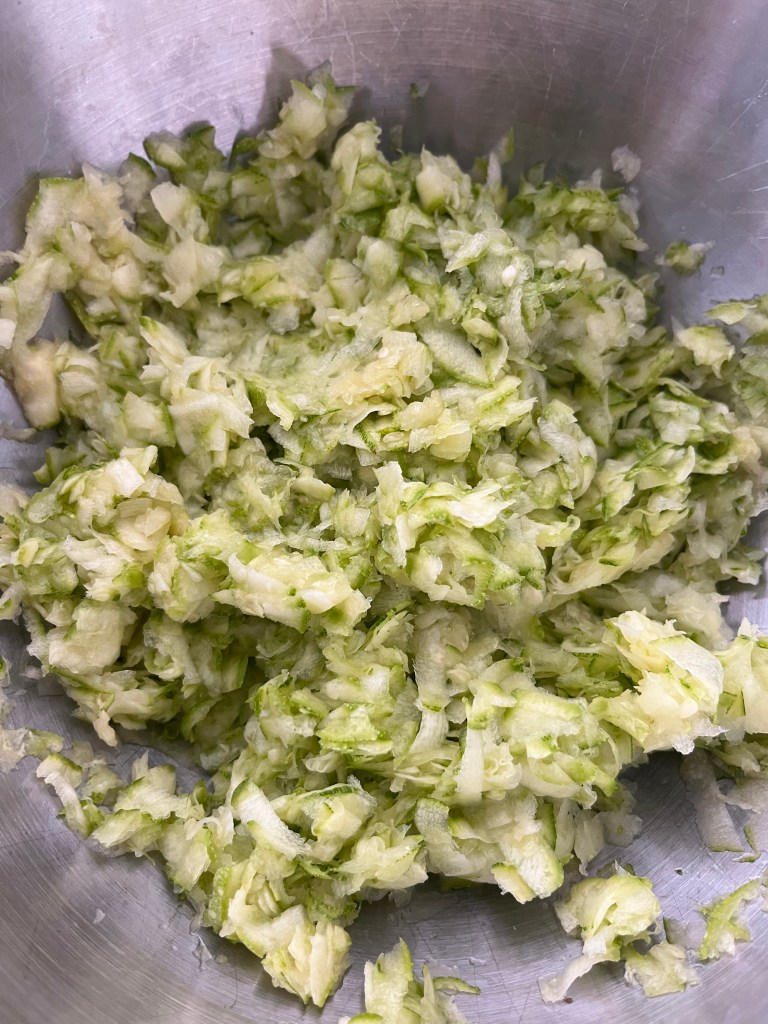
To make. Grate your zucchini on your box grater using the largest holes. If you want to break out the food processor, just pulse a few times to get the size shown below. Do not over process, you are not making soup, you are making butter. It should be mentioned that any color of zucchini or summer squash can be used. I think, as the product arrives at markets or in stores, the smaller varieties would be better because they are sweeter but do not let lack of small vegetables deter you from making this. Your grated product should look like this.
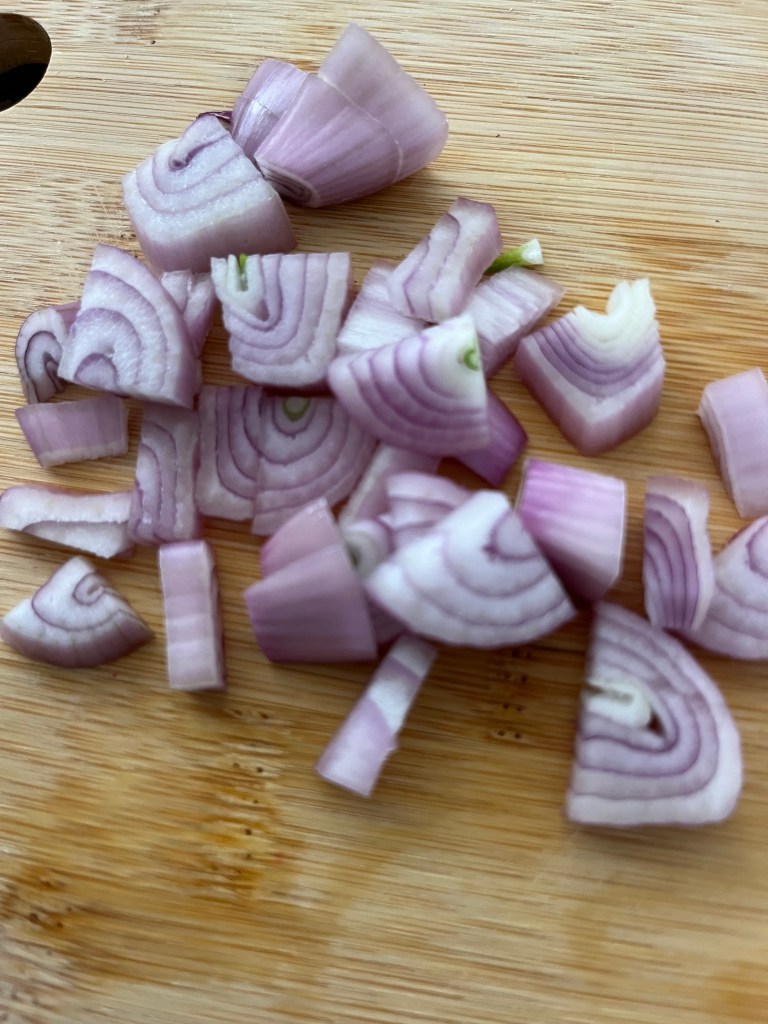
Chop shallot and add to zucchini bowl. No shallots? Use onion. Use scallion. Use garlic, but sparingly. You want to taste zucchini.
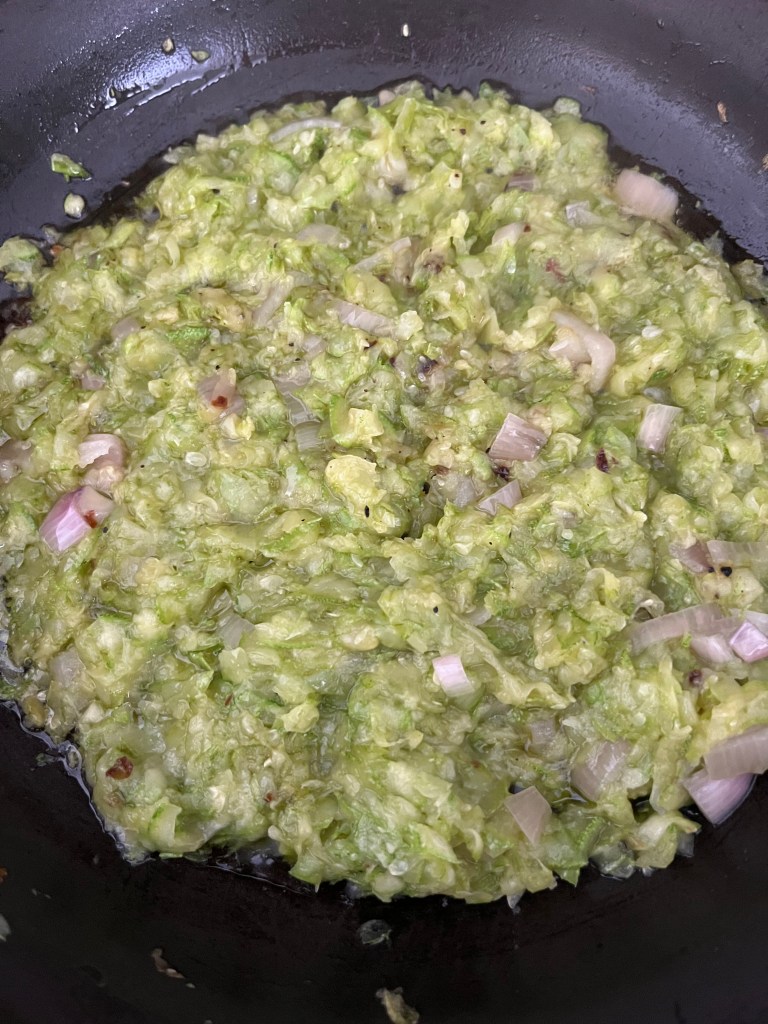
Heat your pan, and after heated, add olive oil. If you are using non stick, add olive oil and heat pan at the same time. Toss in zucchini and shallots, salt and pepper and let cook down. This is halfway through the process.
The water from the zucchini will cook out and the zucchini will soften. The edges may get a bit brown just continue to toss, the whole process will not take more than 15 minutes.
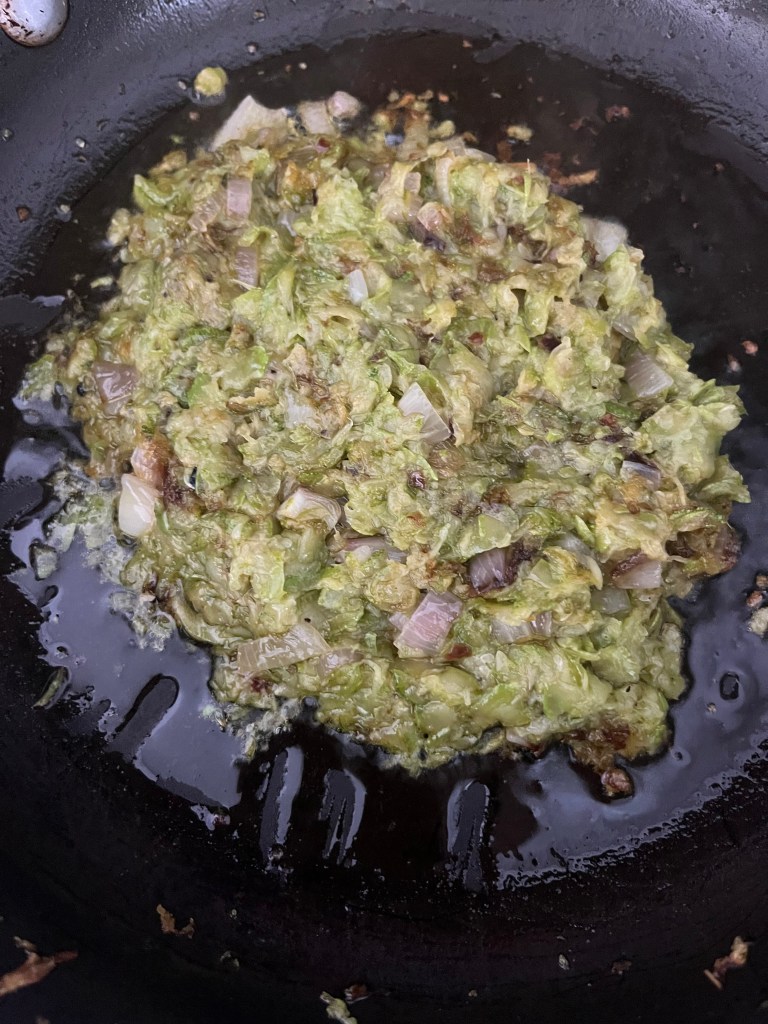
This is the finished product. Allow to cool and you will see that your zucchini has become spreadable, you get it, just like butter! And that’s all there is to it. If it needs more salt, add salt. If you like it a bit more fiery, add red pepper flakes or my favorite Calabrian Chili past. Want basil? Just throw it in. More acidic? A squeeze of lemon. The world is your zucchini!
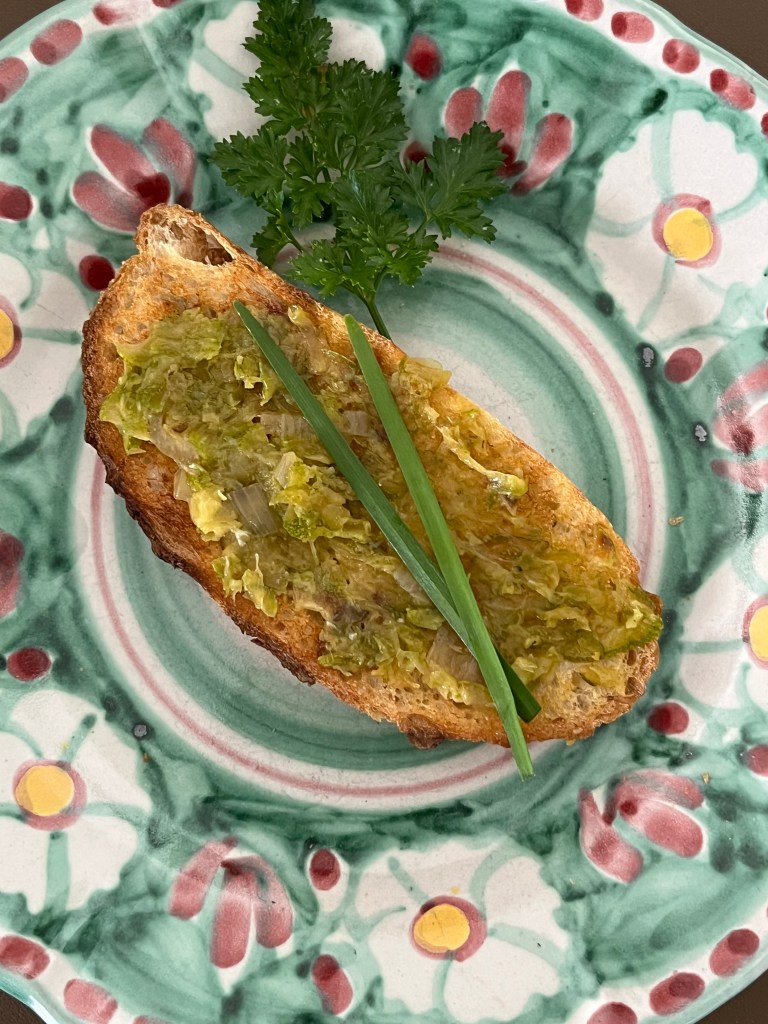
Now what? Below is the simplest way to use. Toast a piece of bread and spread the butter. Eat.
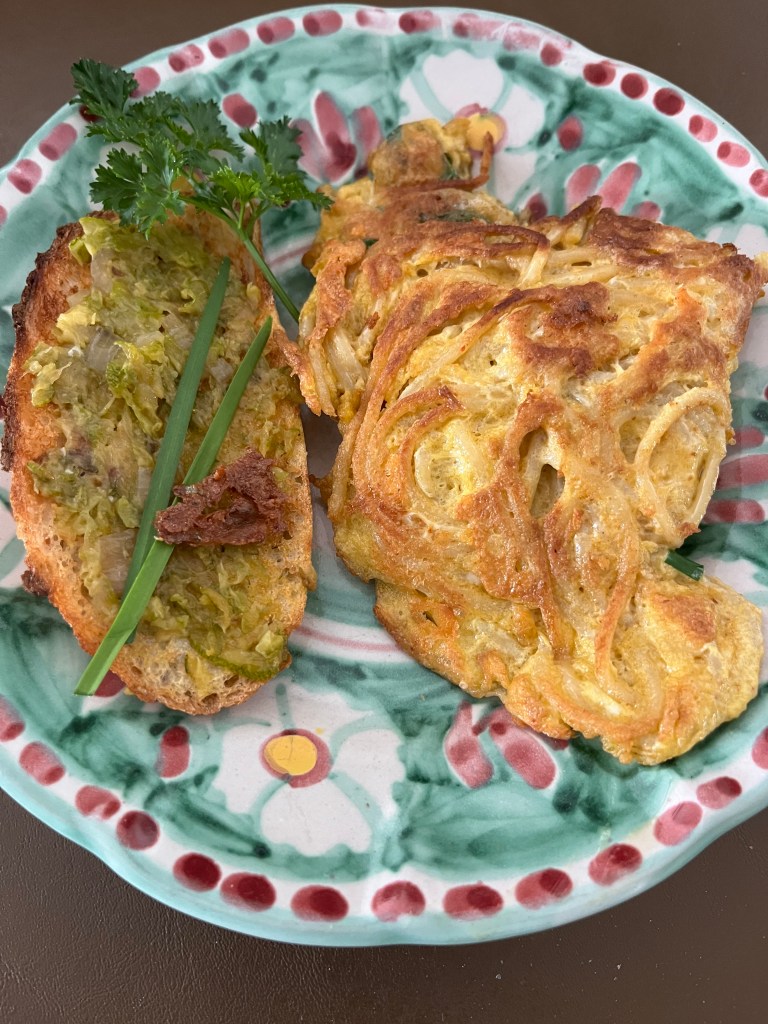
I made breakfast with some leftover pasta and threw a bit of the butter in the eggs and I give you this.
And there you have it. Keep it in the fridge and remove just before spreading. I hope you enjoy it as much as I do!
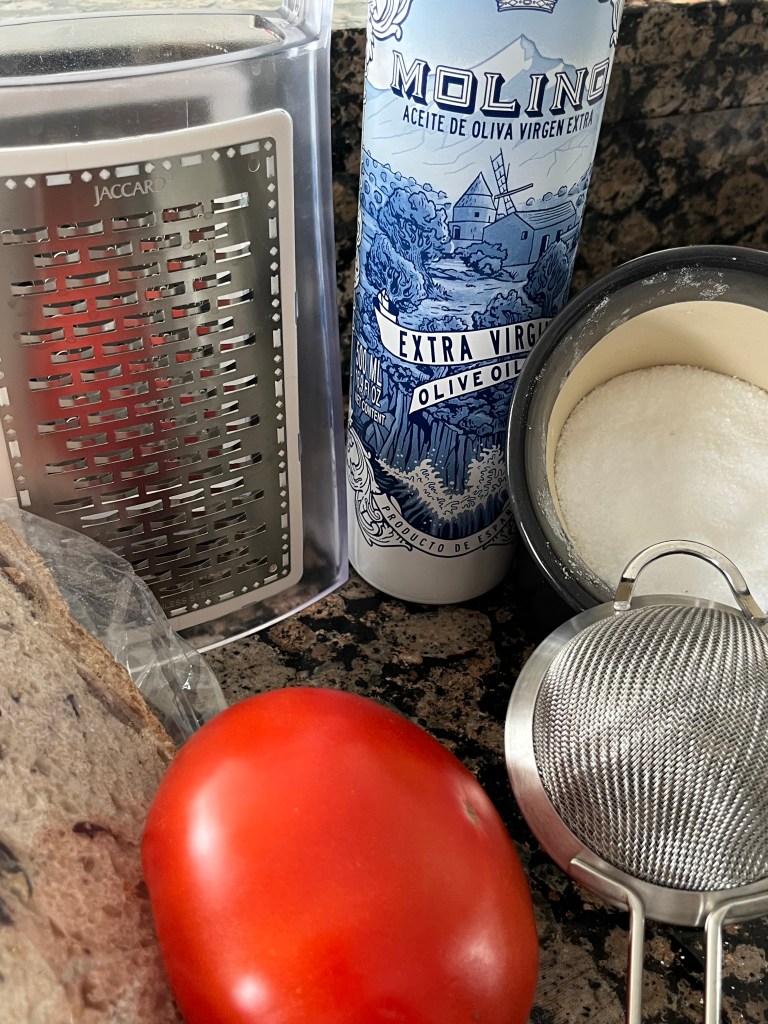
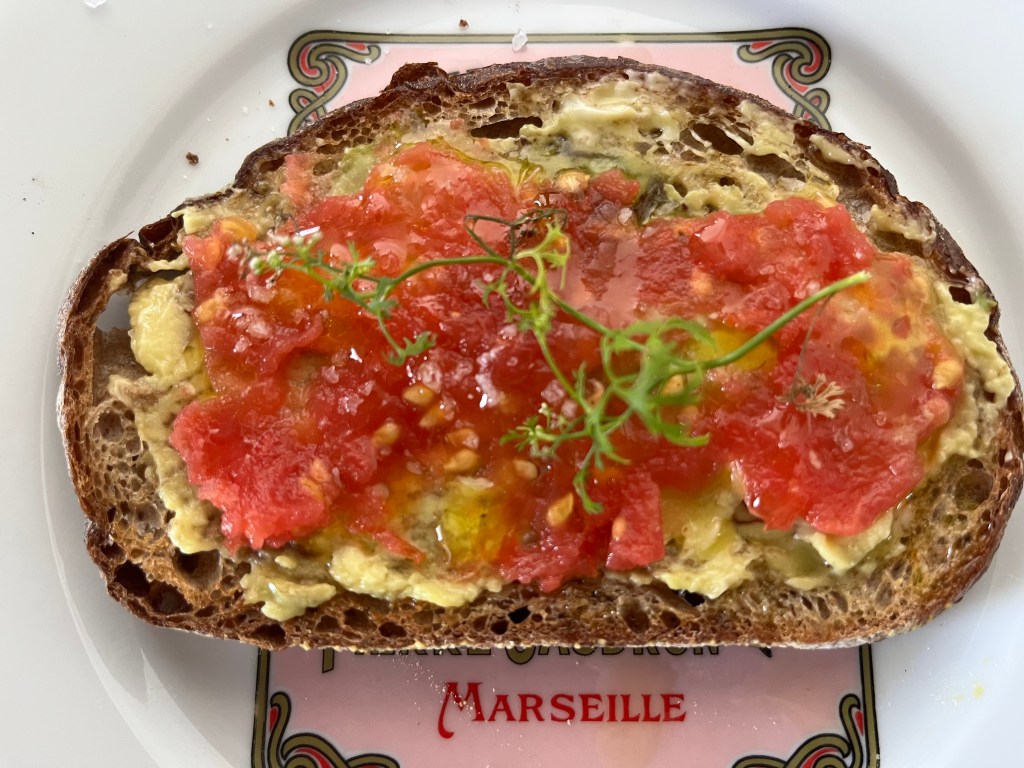
After spending a wonderful and food filled 10 days in Spain, I find that I am drawn more than ever to small bites. Not that I needed that much in the way of encouragement, but the Spanish seem to have developed the final word on yumminess in small plates. So with that in mind, I give you my spin on Pan Tomate. Normally, Pan Tomate is a piece of toast rubbed with some tomato and topped with something. This is an upgraded riff on that-easy, involves no cooking unless you call toasting bread cooking, only a bit of hands on time (think less than 5 minutes) and can be used in a myriad of ways. Perfect for your next happy hour nibble. What you need are these items:
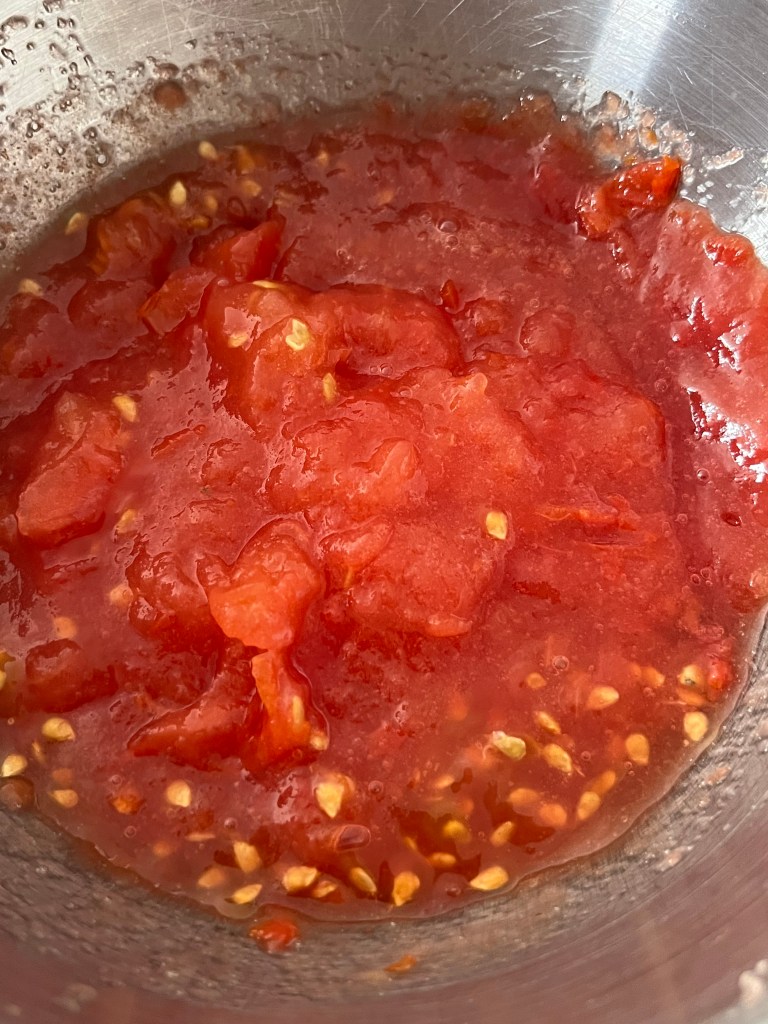
Notice, two of the 6 items are “utensils”. I had a beefsteak tomato that was sitting unused and decided to employ it for this appetizer. Also shown are salt, bread, and oil. I am using Spanish olive oil, use what you want or what you have. The bread is an olive loaf, again, use what you want or have. For you gluten free folks, substitute the olive bread with your gluten free fave. Grate the tomato on the largest holes of the box grater. It may smush if you have an overly ripe tomato, if that occurs, you can chop down the larger pieces, but by and large the tomato will grate easily and you will end up with this.
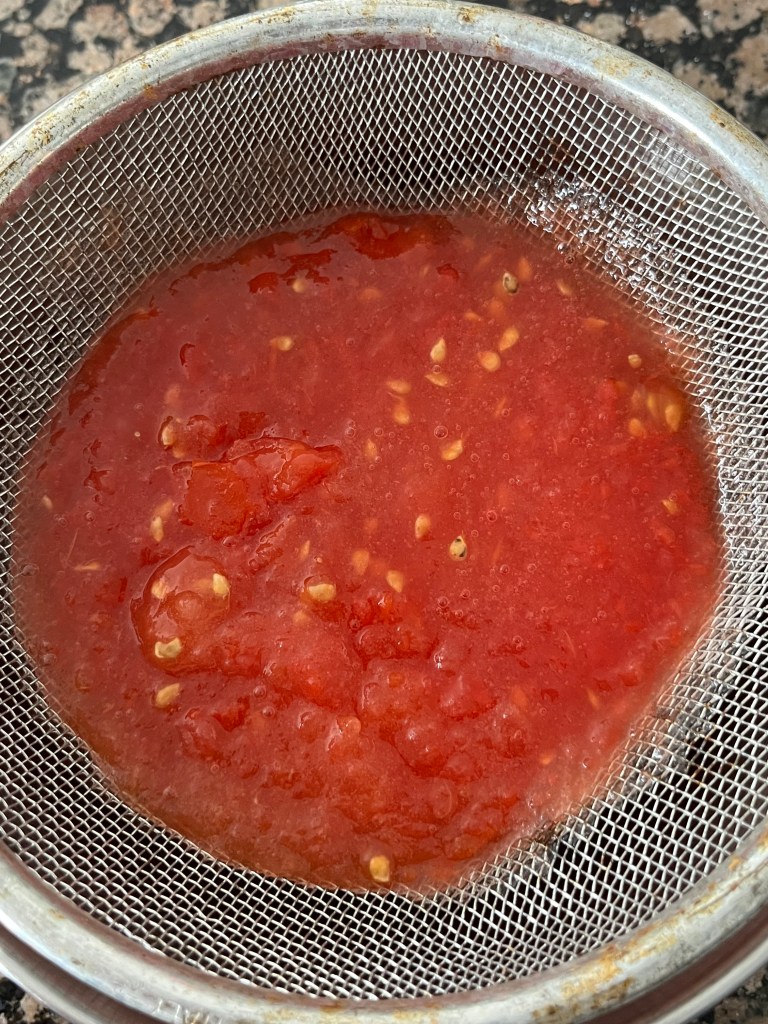
Pour your what is now tomato puree into a strainer placed over a bowl , salt lightly, and allow the tomato to drain. Like so.
The more liquid part of the puree will seep into the bowl below and you will be left with a spreadable product. Don’t worry about the seeds. In Spain, I saw seeds everywhere, even in a 2 Michelin Star restaurant surrounded by the gelatin which holds the seeds in place. They are delicious. A bit tangy.
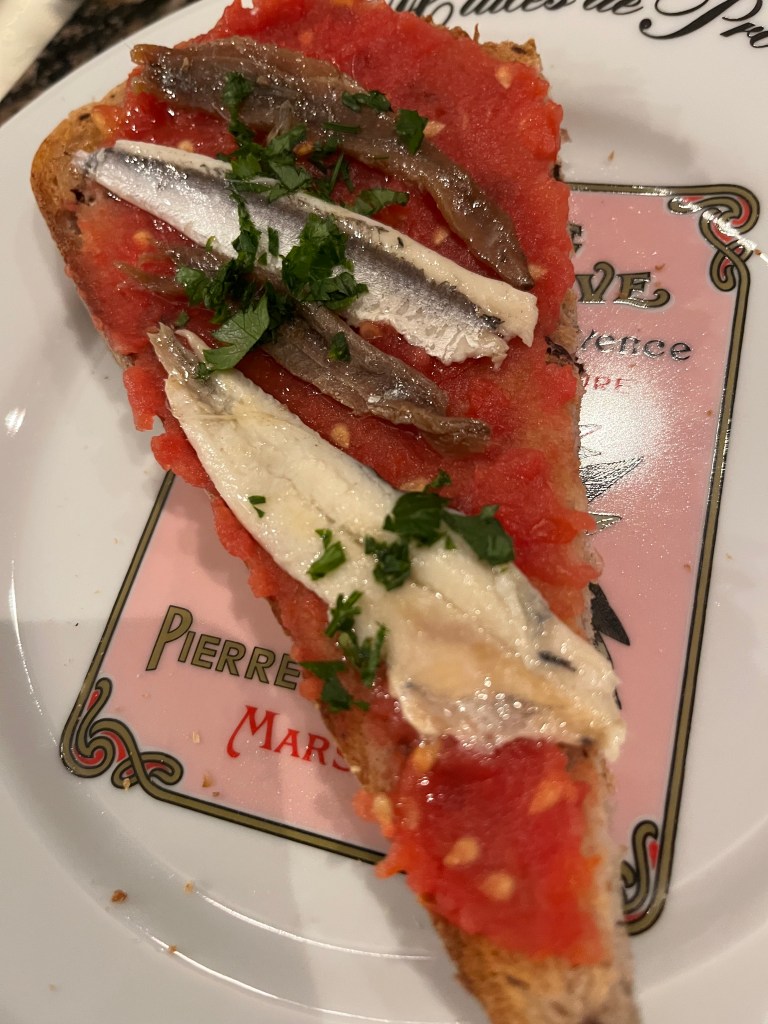
Now the fun part. Take your bread, toast it slightly, and and then “butter it” with the tomato. I will show you two different iterations. The first was part of a tapas dinner on a Sunday night. The second was a breakfast toast with avocado.
In Madrid, they call this a matrimonio. A combination of white and grey anchovies for anchovy lovers. I love anchovies, but admit that there are haters out there. Maybe you should give them another go??
This is tamer. Both were delicious. Topped with a bit of salt and a drizzle of olive oil. Pepper if you want. Parsley or cilantro.
So what else can you use? Top with thinly sliced manchego. Top with tinned tuna or another tinned fish. Top with a slice of sweet onion. You can even top with a fried egg. You are only limited by your imagination!
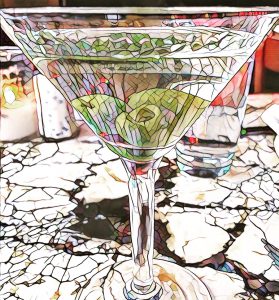
Now what to do with the tomato water that filtered out. Martini lovers, I am looking at you! Add to some chilled Vodka, skewer a small piece of Mozzarella and a leaf of basil. Not your grandmother’s Caprese!
I hope you make this. Like I said it is so easy to prepare, inexpensive, and so many ways to enjoy!
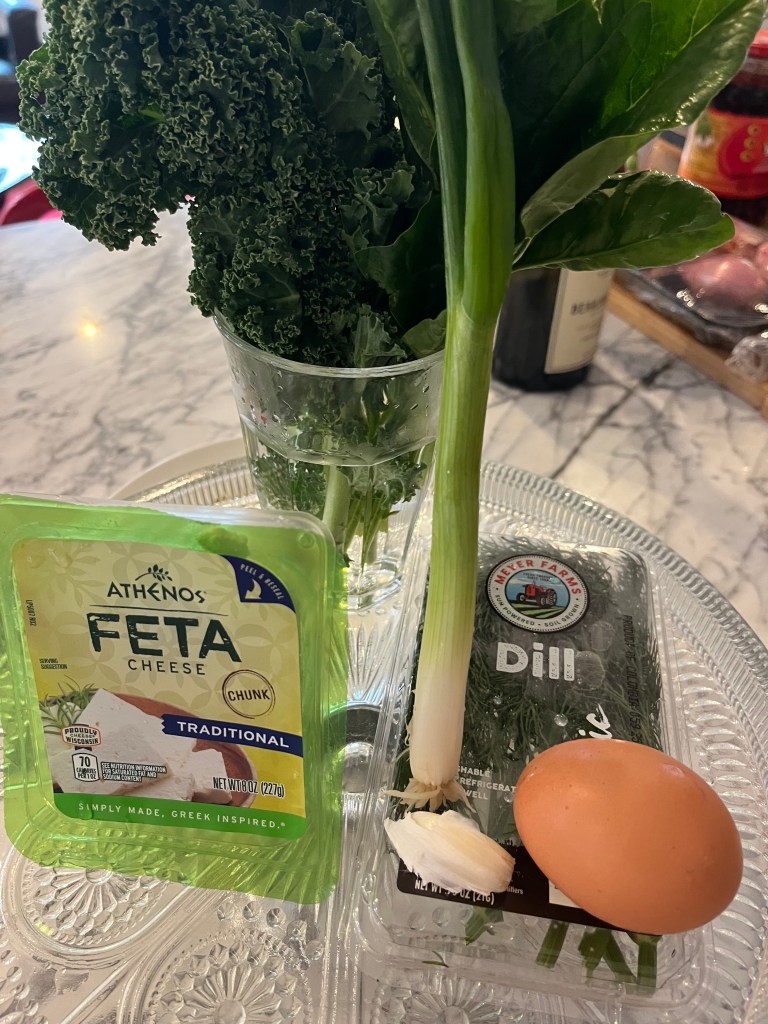
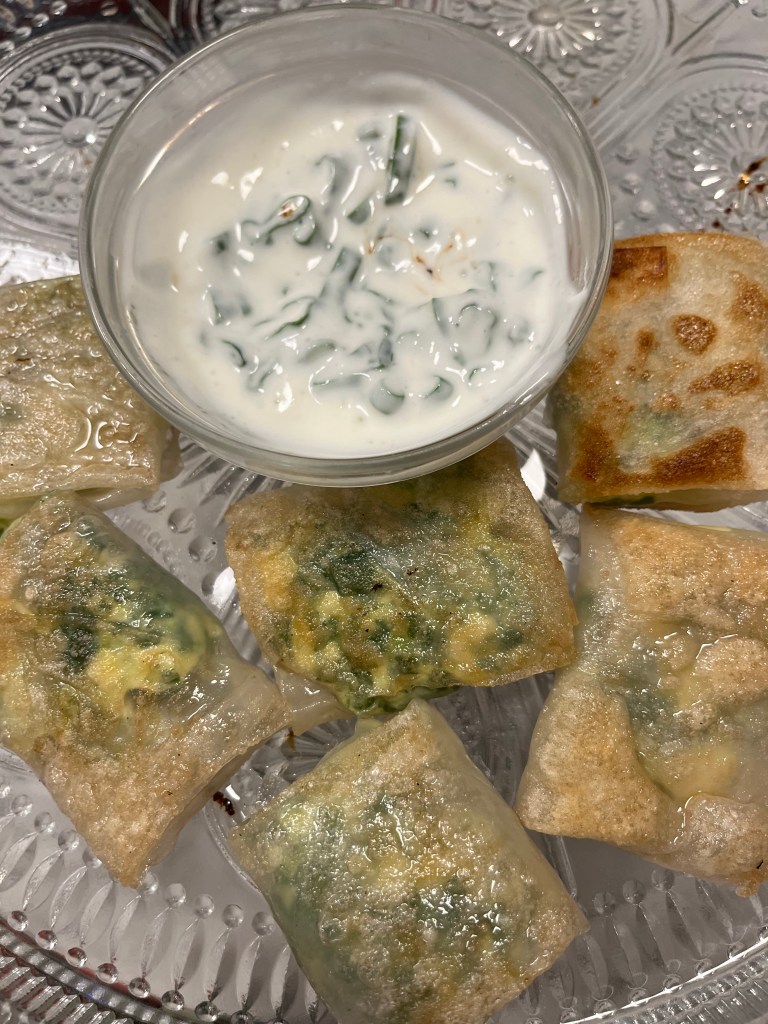
I am currently visiting family in Chicago. This visit always turns into a food-a-thon, and that is great fun. While going through the pantry looking for something, I happened upon a sleeve of large rice paper wrappers which had seen better days. We had had a salad the night before and there was some fresh spinach left. I had to do a run to the grocery store and picked up some curly kale for another salad. While putting things away into the fridge, I saw a half block of feta and some unopened dill and realized that there was enough of everything to make filling for spanakopita and figured I would try it with the rice paper bits for Happy Hour nibbles. It worked. Lo and behold, I give you rice paper treats.
The fixings. This made 12 squares.
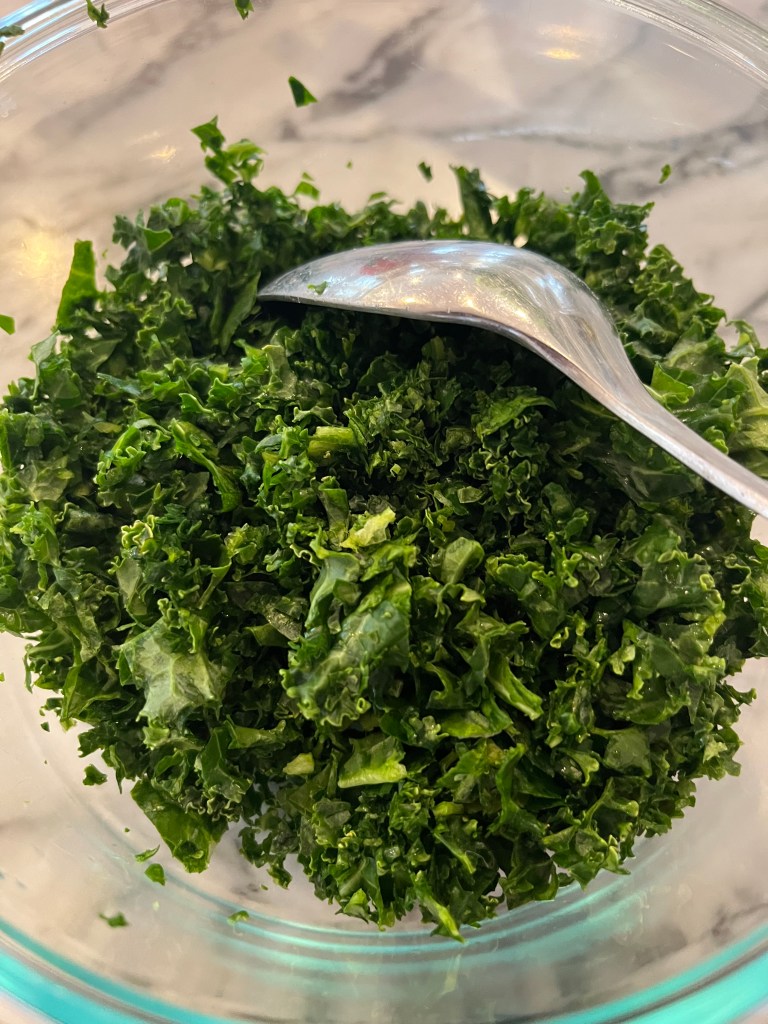
First, I chopped the spinach and kale really finely. You can probably do the same in a food processor, but I didn’t want to take out another appliance. Get the greens as fine as you can and then squeeze out as much liquid as you can to get a dry mix.
Chop the scallion, garlic, and dill and add to the spinach/kale bowl. Season with salt and pepper to taste and mix.
Add the egg and stir all together.
Crumble the feta (use as much as you want, I used about 1/4 block) and add to the entire mix. Stir to combine. If you want to taste, make a small patty and cook to make sure you have all the seasonings ok. A grate or two of nutmeg would go really well with the greens, I forgot to add but you will do better.
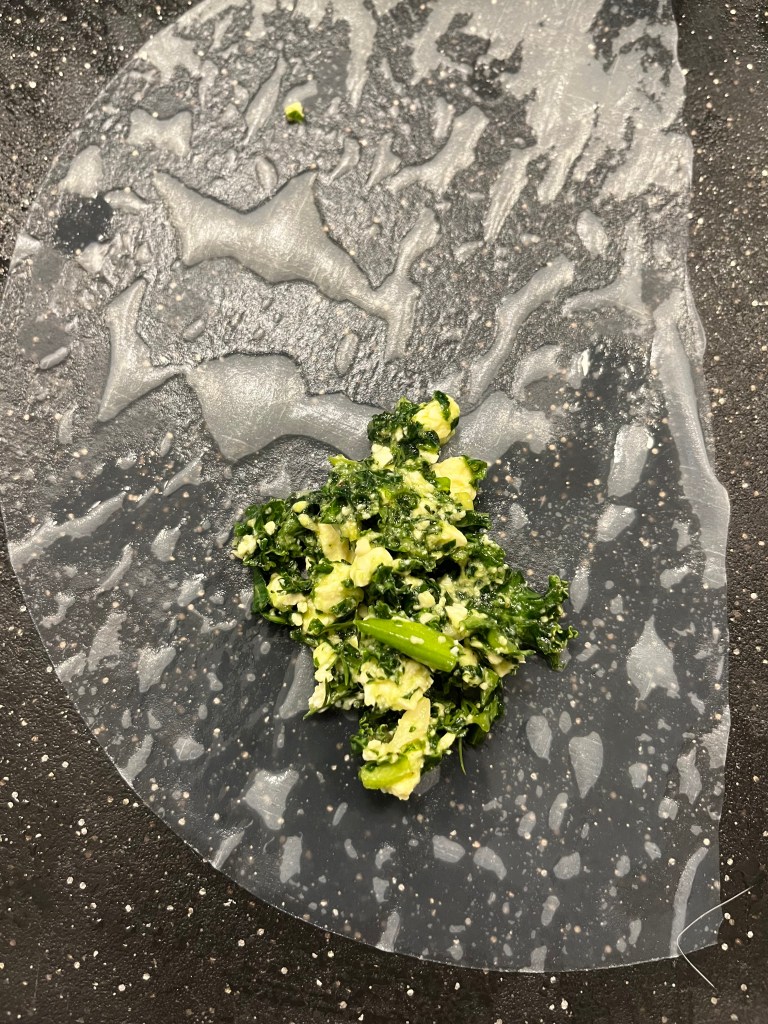
Now, set a dinner plate aside and add some water. Take a second dinner plate or a tray and spray or brush with oil. Take a rice paper sheet and place on the water plate for a few seconds. Flip the sheet and let sit for another few seconds. Take out and place on your board. Add a spoonful of the mix to the part of the sheet closest to you like so.
You can see that the paper is damp. That is what you want. The damper it is, the easier it is to roll. Starting at the bottom, fold the paper over the mix, then fold the two sides over and roll and flatten, much like you would do with a burrito. Place on the oil plate. Repeat until you have finished the filling or run out of paper. I forgot to take a foto of the wrapped square, but you will see in the finished product below.
Oil a non stick pan and place the squares over medium heat. They will get crispy and the interior will cook. Flip after a few minutes, that depends on how brown you want the exterior or how many people are hovering over you as you cook. I made 12. As I was taking them out of the pan, they were eaten. I had to move fast to get a finished picture!
I made a quick dip with some yogurt and the scallion tops that were left and that was it!
Why do I love this and why will I make it again? It’s easy. It tastes good. I always have rice paper sheets and you should too, they can be used for so many things, cooked and uncooked! Everyone loves hot crispy things. And it is so much easier than making with phyllo because you do not have to wait 24-48 hours for the phyllo to defrost. You don’t have to keep the rice paper sheets covered while you work. It’s gluten free for your gluten free friends. It took about 15 minutes to put the whole thing together including taking fotos to show you. Did I say it tastes good? I hope you try it. If you do, let me know how it goes!
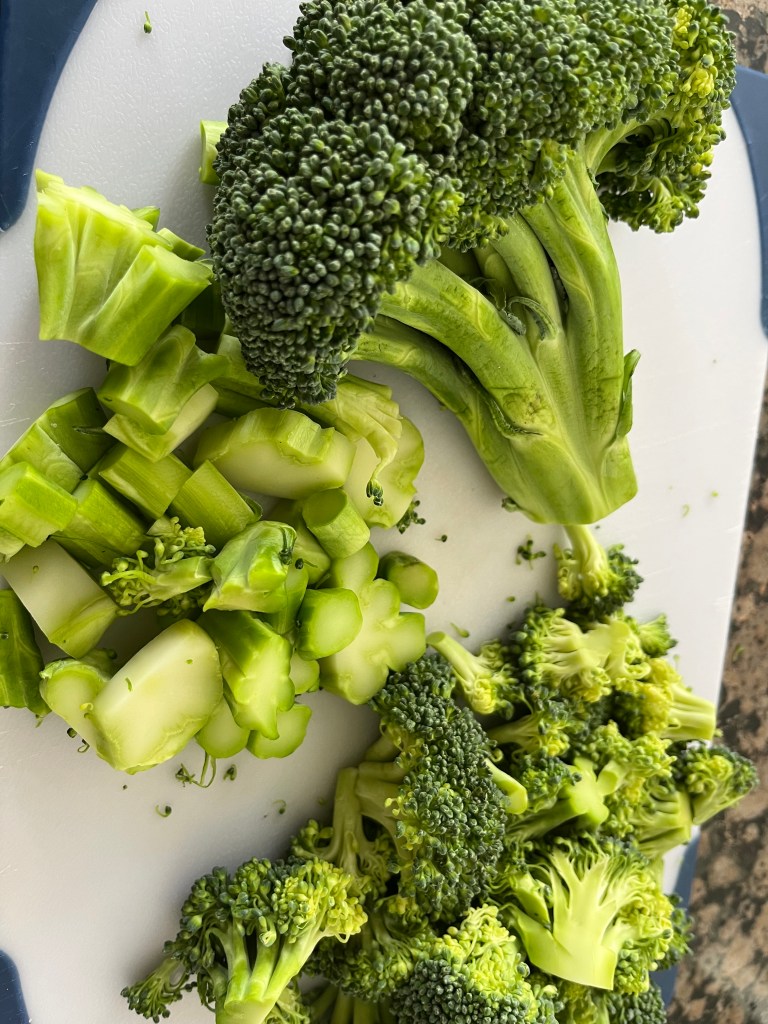
I was testing a recipe for pork spareribs for a Lunar New Year party that we are having in my building. I found the pork recipe I wanted, but as I was making the ribs for dinner, I needed a side veggie to go with the pork and rice. I had some fresh broccoli in the fridge, so that became my side and the inspiration for this post. The good thing about this prep is that the seasonings can be used for a roasted side or a steamed dish. And the ingredients are probably things you have, but I am including some two items that you may want to keep on hand for future use. Both of these items can be stored in the fridge for a bit, so it may make sense to add them to your everyday larder. Or not, you do you.
To prep the broccoli for either steaming or roasting, break down the florets into smaller pieces and peel the stems and cut them into coins. Here I have two small broccoli crowns; you can see the before and after.
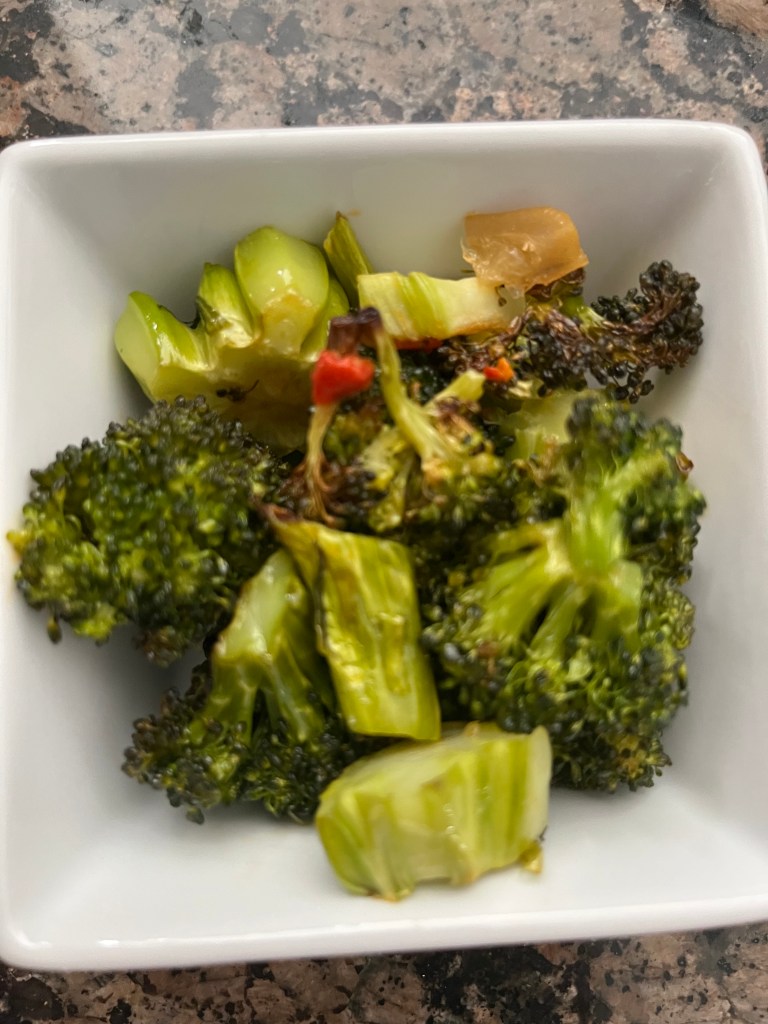
If steaming, just add to your steamer and cook to your liking. If roasting, which I prefer, toss with a bit of neutral oil and add to roasting pan. Don’t crowd pan or your broccoli will not crisp up and I like my broccoli with crunchy edges. I set oven to a pretty high heat, 400-425 for about 15 minutes. After that, toss and keep an eye on the pan, burnt isn’t good. Roast to your preferred taste and remove.
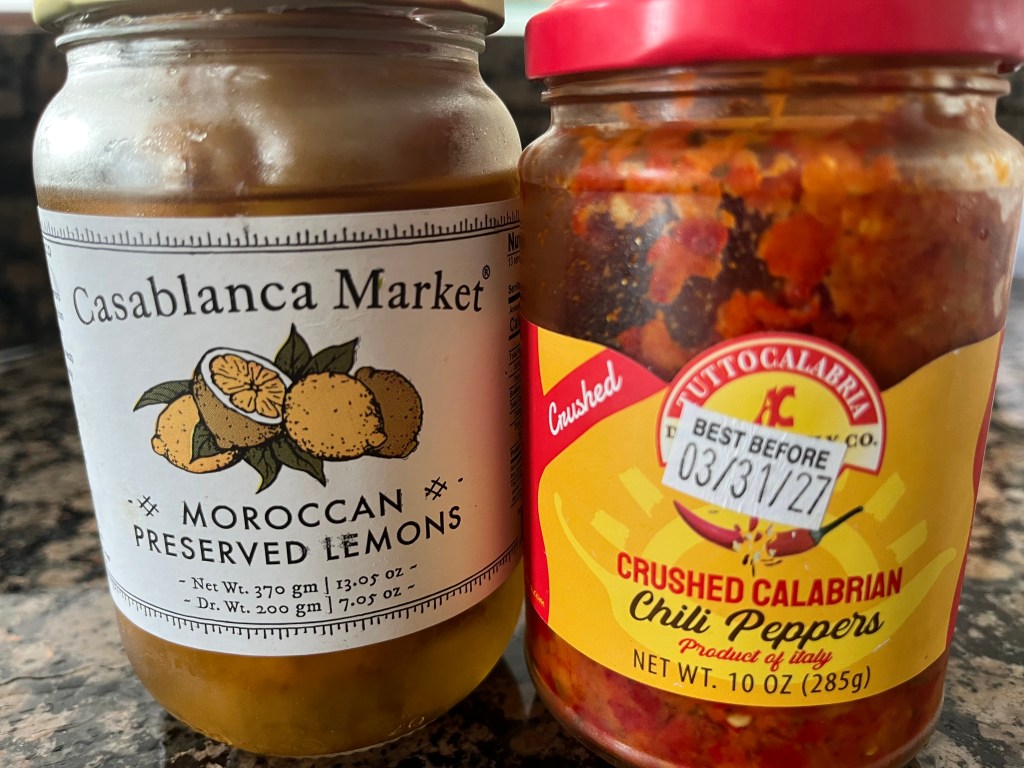
To finish the dish, you are ready to season. Simply, toss with lemon juice and chili flakes, salt and pepper to taste. Or you can bougee the dish with these ingredients, and these make a big and tasty difference.
Notice the use by date on the peppers. Once you get accustomed to using these peppers, you will go through them long before the use by date. The preserved lemons are a pickle by another name and last for a long time as well. See sentence regarding peppers and repeat.
With both of these ingredients, a little goes a long way so taste as you go. The peppers have a bit of a kick and the lemons are salty. A scant 1/2 teaspoon of the peppers will suffice for the amount of broccoli shown if you want just a bit of heat. The lemons are soft, again I use scant 1/2 teaspoon to start and toss with chilis and broccoli and taste for seasoning. That’s it. Either dish can be served hot, at room temp, or chilled for a salad. If taking from fridge, remove about 10 minutes before serving to let the flavors come back to life.
Want another idea on how to use? Crostini. Toast some bread, rub with a clove of garlic, chop the broccoli a bit finer, and top the toast. Drizzle a bit of olive oil to complete the dish. Serve with a glass of red wine. Enjoy!
After a bit of a hiatus, you know, Covid (blame everything on Covid), life, laziness, the usual, I am restarting my bitty blog about nibbles. Those of you who subscribe may be happy (I hope so), hopefully some new followers may appear. With a New Year and resolutions pushing at me, the time seems right. So without further ado, let’s get started
RED WINE MUSHROOM RAGOUT.
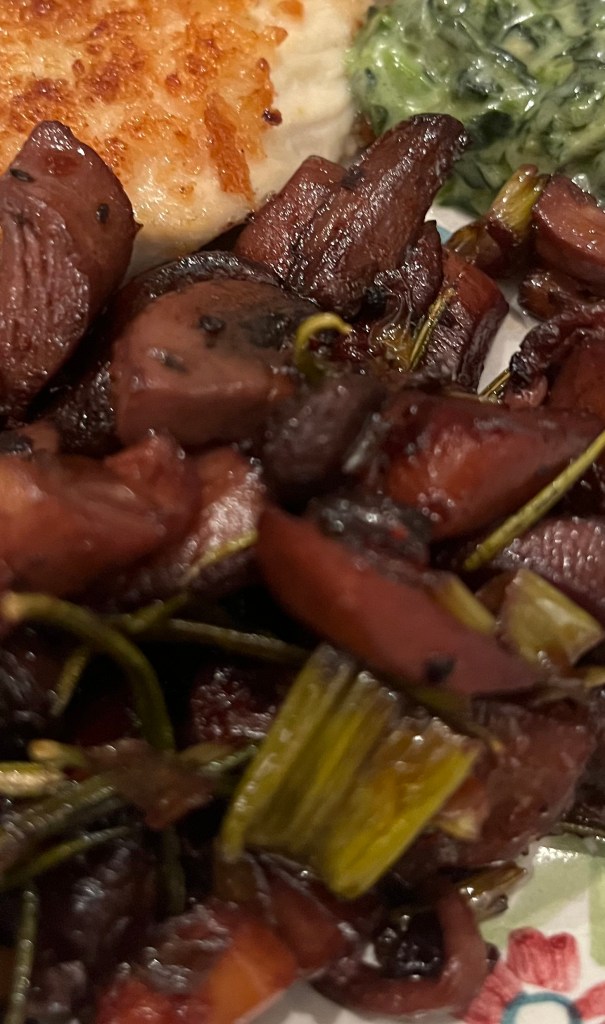
This will be an easy start. I made this mushroom ragout with an excess of what I purchased for my duxelles for Christmas Beef Wellington (another post). Fairly simple, but so delicious, I served it along with chicken cutlets coated with garlic breadcrumbs which were made with leftover bread for the same holiday. You can serve it on toasts, topped with an egg for a Sunday brunch , or toss in pasta. The world is your mushroom!
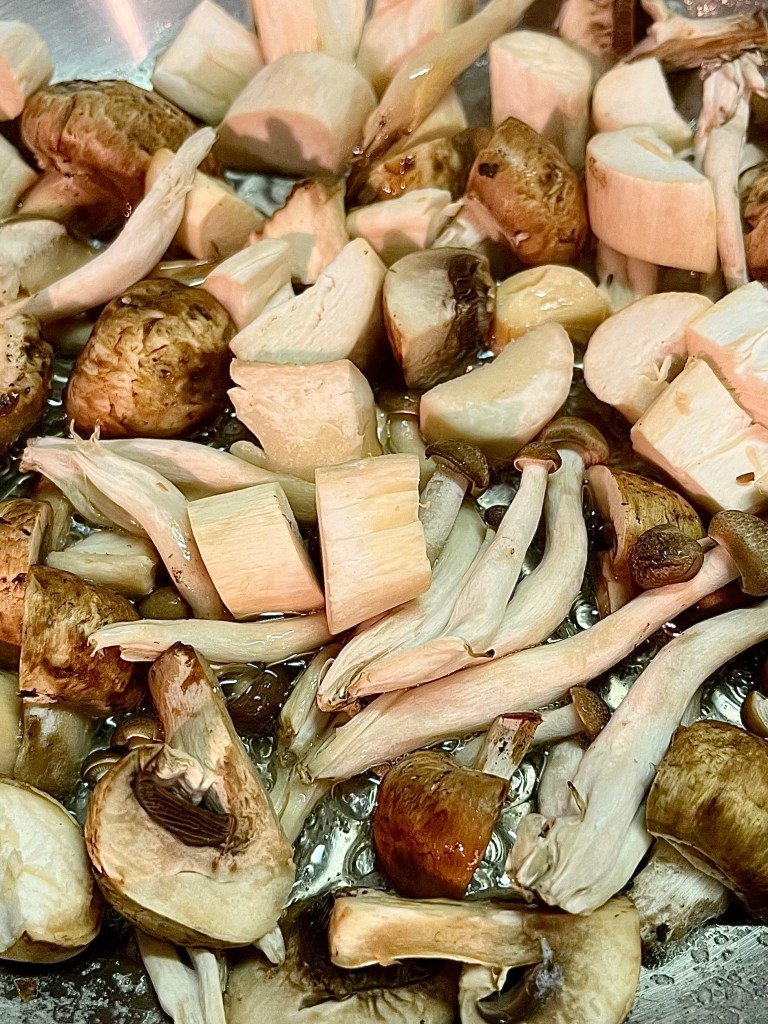
Back to the mushrooms. I had an assortment. In addition to chopped and shredded mushrooms, I minced a garlic clove and a scallion. You can use shallot or onion, I had some scallions left so I used them before I lost them. A sprig of rosemary or thyme A bit of chicken stock or just water and 1/2 cup red wine whatever you have. I had some Beaujolais and I used that. Salt and pepper to taste.
Heat skillet over medium high and then add some neutral oil along with some butter (you can use any fat, but add a bit of neutral oil like grapeseed or canola to raise the heating point). Toss in the mushrooms taking care not to crowd. If you can see some space between the shrooms, you are ok. Otherwise, they will steam and not brown (thank you Julia Child).
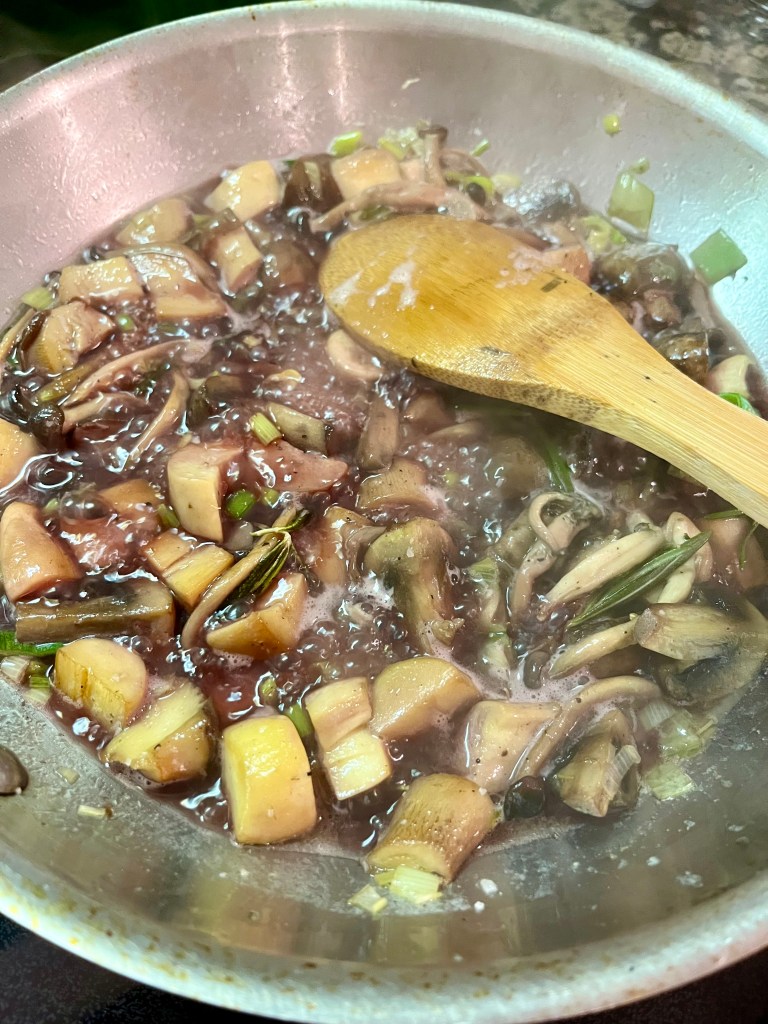
As soon as the mushrooms start to brown (about 5 minutes or so) add the garlic and scallion. Waiting after the cooking process has started will prevent the garlic from burning. Allow the scallion and garlic to soften and flavor the mushrooms. Toss in the chicken stock or water to deglaze and then add the red wine and the rosemary. It should look like this.
Let the red wine cook down until the sauce becomes a purple color and thickens the dish. Salt and pepper to taste and that’s it.
Not the best photo but you can see the purple hue of the finished product. The wine has cooked off and all you have is the flavor.
So there you have it. Nibbles and Bits.2 for 2025.


")


