Salmon Cakelets

For my niece Anna as she steps into fish world!

This is a riff on a Jamie Oliver recipe. I will start by saying that. There are some changes, however, so do not call out the plagiarism police on me! After all, as Coco Chanel said, “imitation is the highest form of flattery”. The idea came about because we were having a family nibble night for a myriad of celebrations. College graduation, impending birthday, upcoming family reunion for July 4th. There were a lot of tastes involved and we all contributed something in some way. My niece, Anna, is beginning to try seafood after years as a vegetarian. So I thought of a recipe that I had seen on the Jamie Oliver channel and thought I could downsize the cakes (hence cakelets). I gave her a list of ingredients and she loved them all so we decided to make them together. From start to finish. Including tasting for taste. It was great fun. I give you Salmon Cakelets.

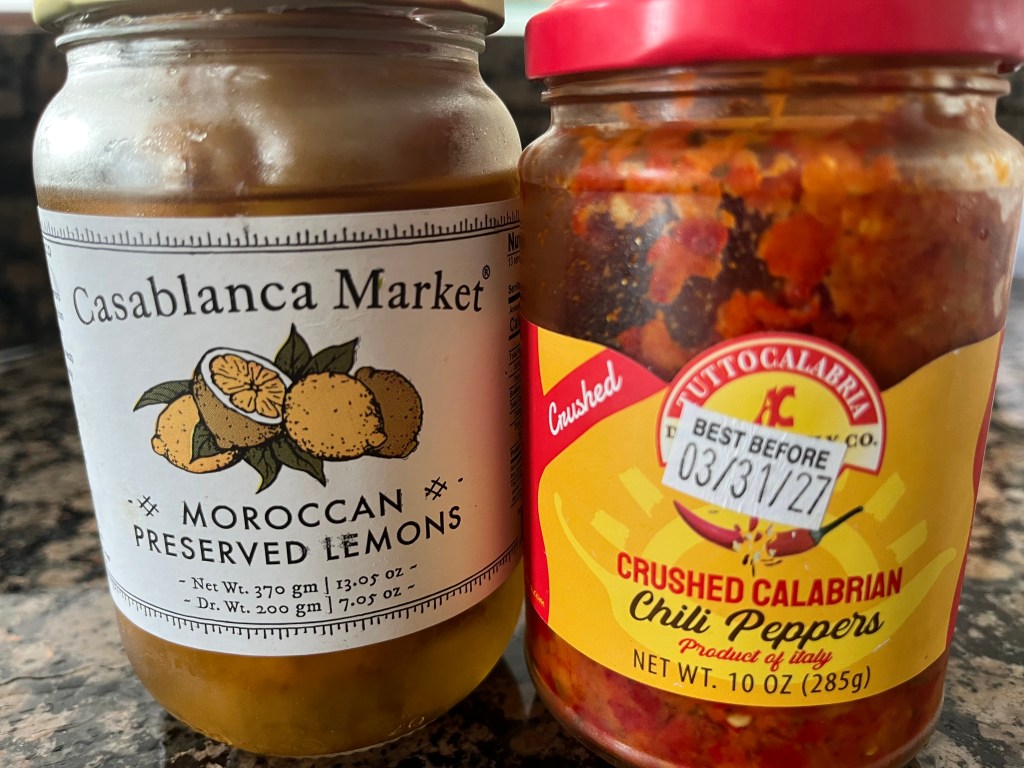
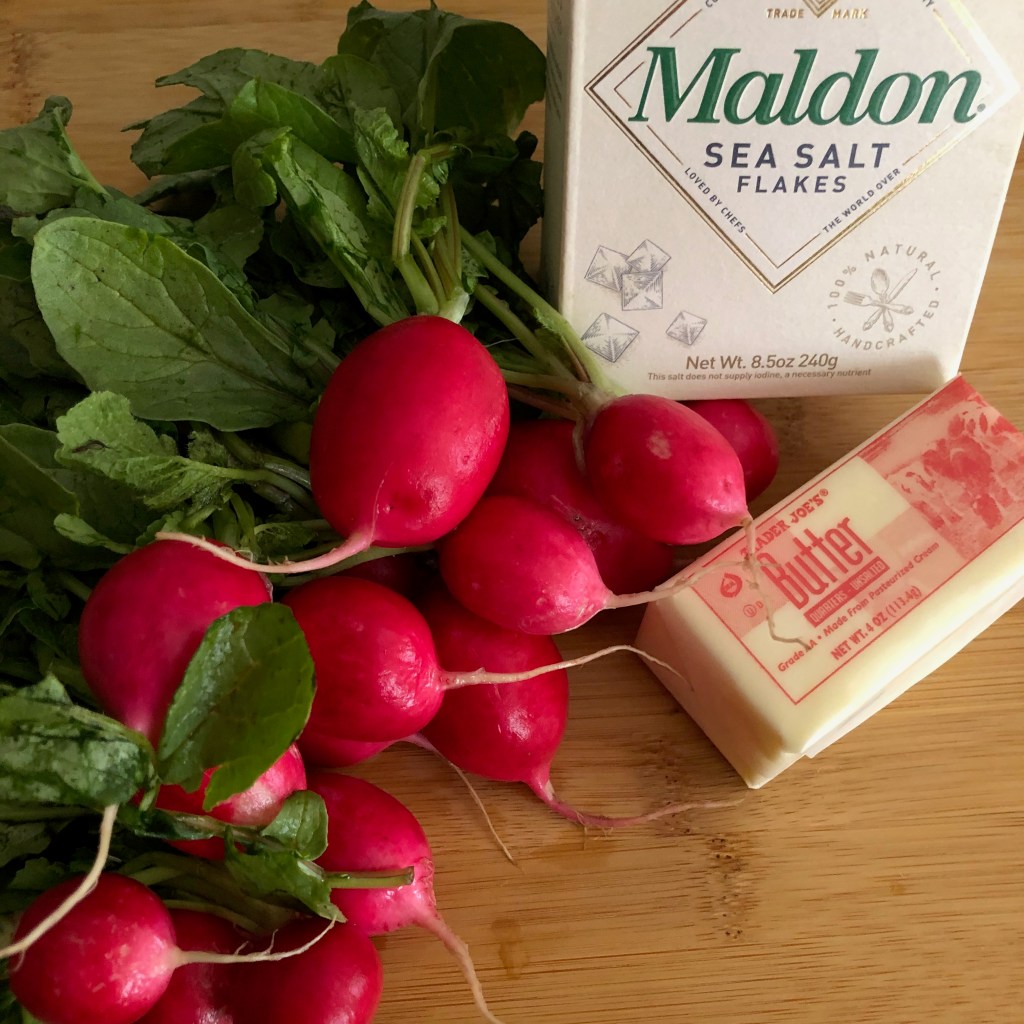
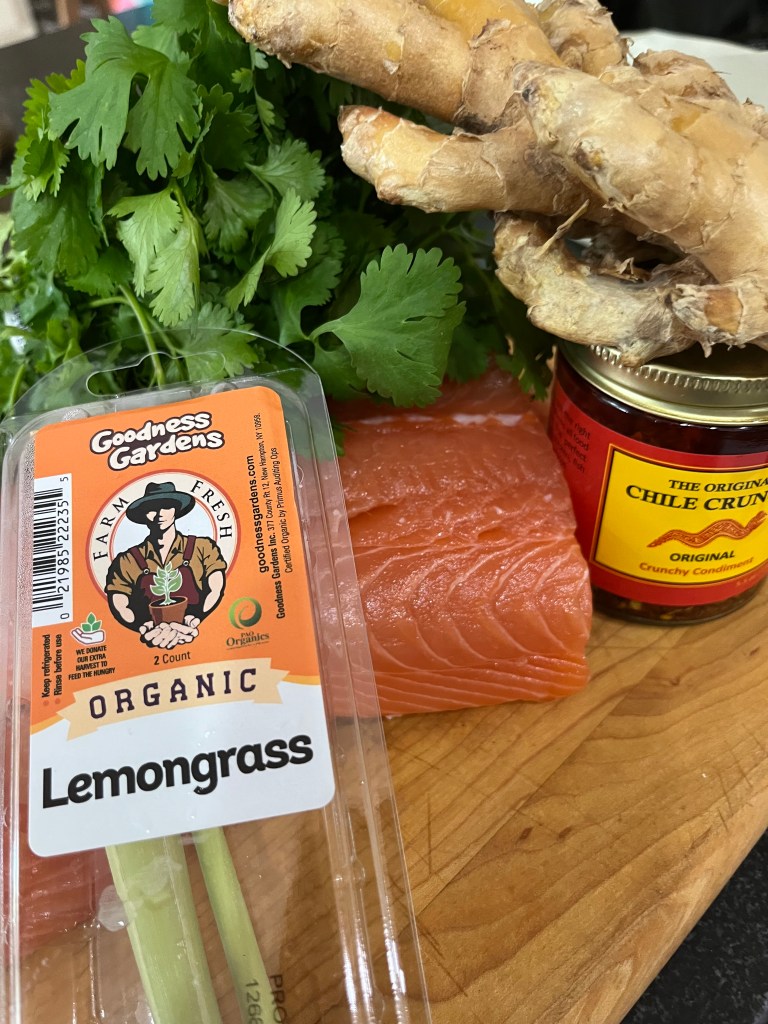
For this recipe, I used 2 pounds of Atlantic salmon which I skinned. If you are not comfortable skinning the fish, ask your fish purveyor to do it for you. It is quite easy and the skin makes fabulous cracklings. Different recipe….. Also needed were 2 stalks of lemon grass (use lemon rind or lime rind if you cannot find lemon grass and taste for flavor), about a 1-1/2 inch piece of peeled ginger, a bunch of cilantro, and chili oil. I make my own chili oil so I used that, but included a picture of what you need should you make this. Cooking time is enough time to fry the cakes, but allow about 1/2 hour before cooking for resting in fridge.

First, peel the salmon skin and chop into 1/4 inch pieces. Flatten the lemon grass and remove the outer hard bits. Chop as finely as possible. Do the same with the ginger and the cilantro, using leaves and stalks.

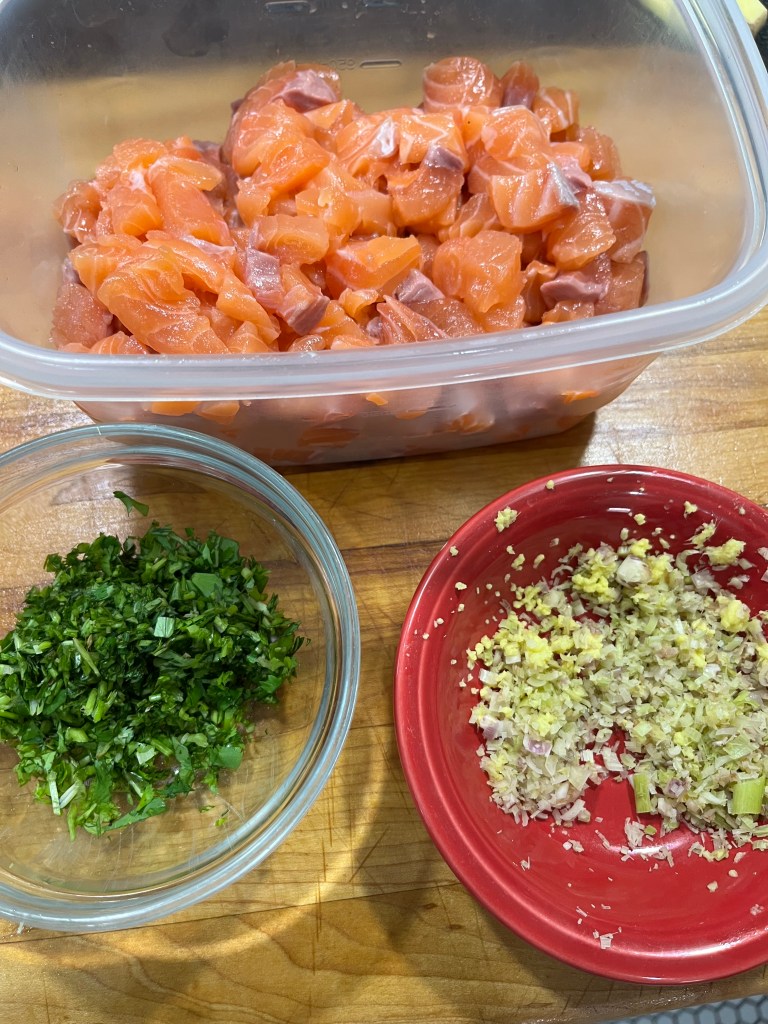
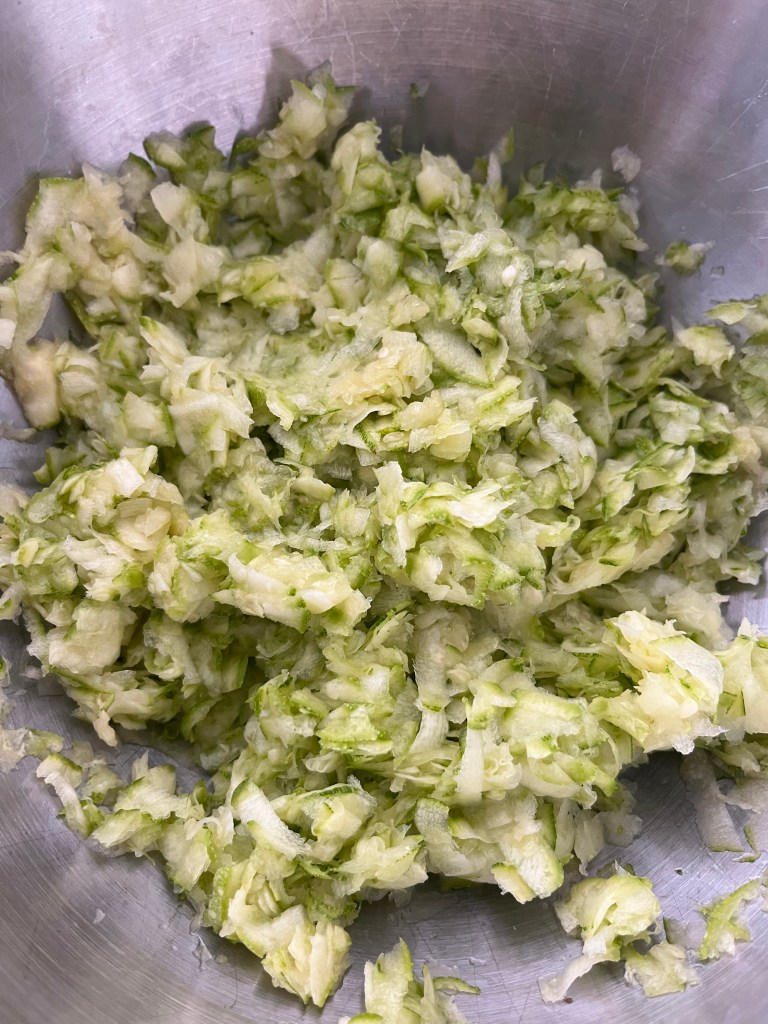
I have combined the lemon grass and ginger in a bowl. I separated out the cilantro because not everyone is a fan so I made half with and half without to please everyone.

Now take 1/2 of the cubed salmon and cut down to almost a paste. You can do this in a food processor, but why take out a piece of equipment when a knife works just as well and is easier to clean! Besides, great stress reliever….. Add the lemon grass/ginger mix as you chop. You will. have this:

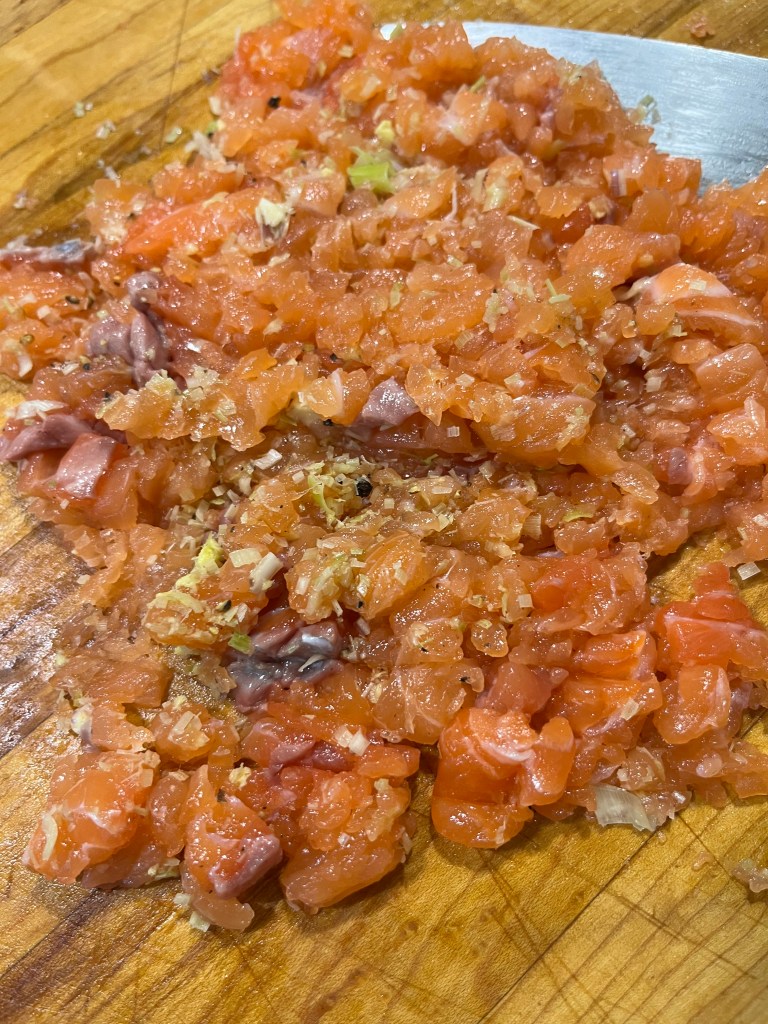
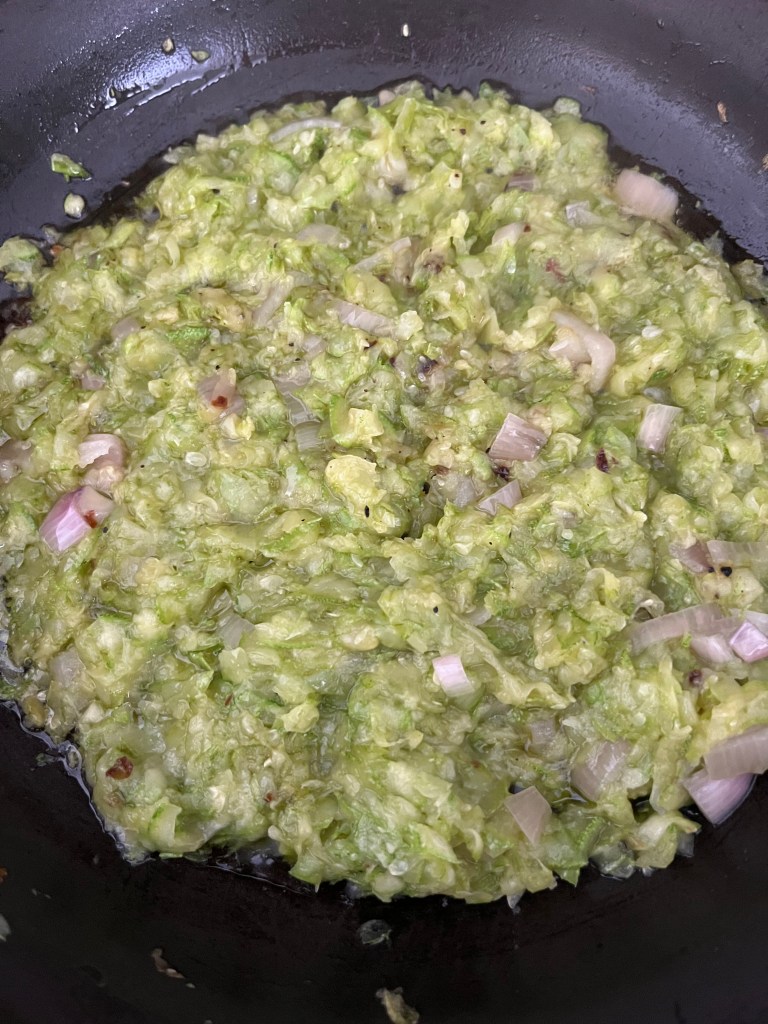
Add the remaining salmon chunks to this minced down product and continue to chop all together keeping the bigger chunks bigger than the minced bits but making a somewhat homogenous mix.

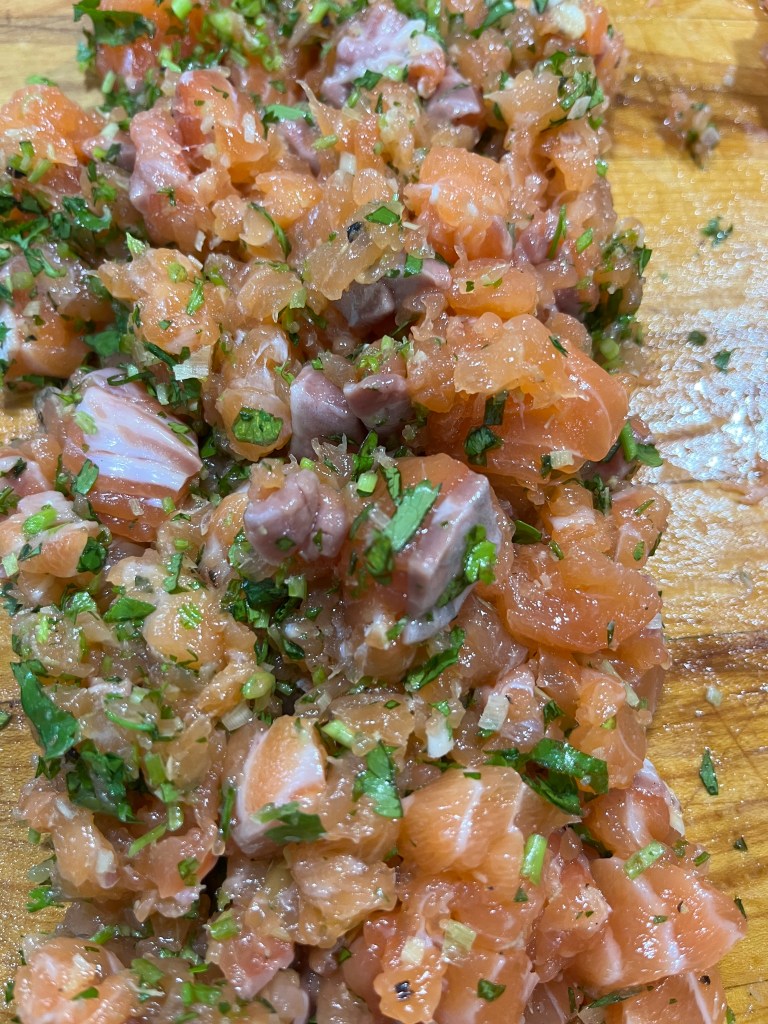
Quite frankly, I took this photo and chopped a bit further because Anna thought the cakelets were not holding together. She was right. If you make larger cakes it is a bit easier for the finished product to set. You will notice that there is cilantro in this photo. I split out the with and without prior to taking this pix, but if you are not splitting, just mix it all in when you add the ginger and lemon grass (or grated lemon rind or lime rind). Add salt. I think next time I will use soy sauce for this. It will give a better flavor. At this point, if you are a sushi eater, you can taste for seasoning (as I did which is when I realized it needed more salt). If you rather have it cooked, make a small patty to taste.

For patties (cakelets). Form a 1 1/2-2 inch ball and press to form a chunky pancake like thing. Make all the patties at once and then refrigerate for about 1/2 hour.

The best way to cook is to use a non-stick skillet but one was not available so I used cooking spray. Heat the skillet and then spray. Hot Pan Cold Oil. Good trick to remember to keep things from sticking. Learned that at a Chinese cooking class. (the actual quote is hot wok cold oil…).

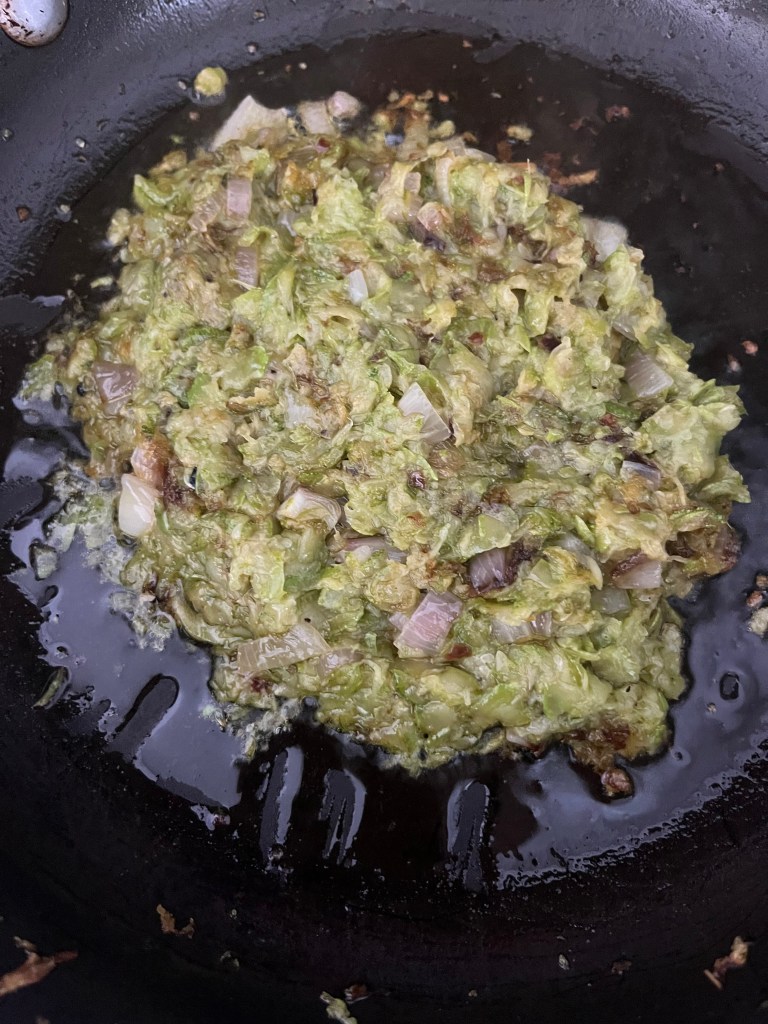
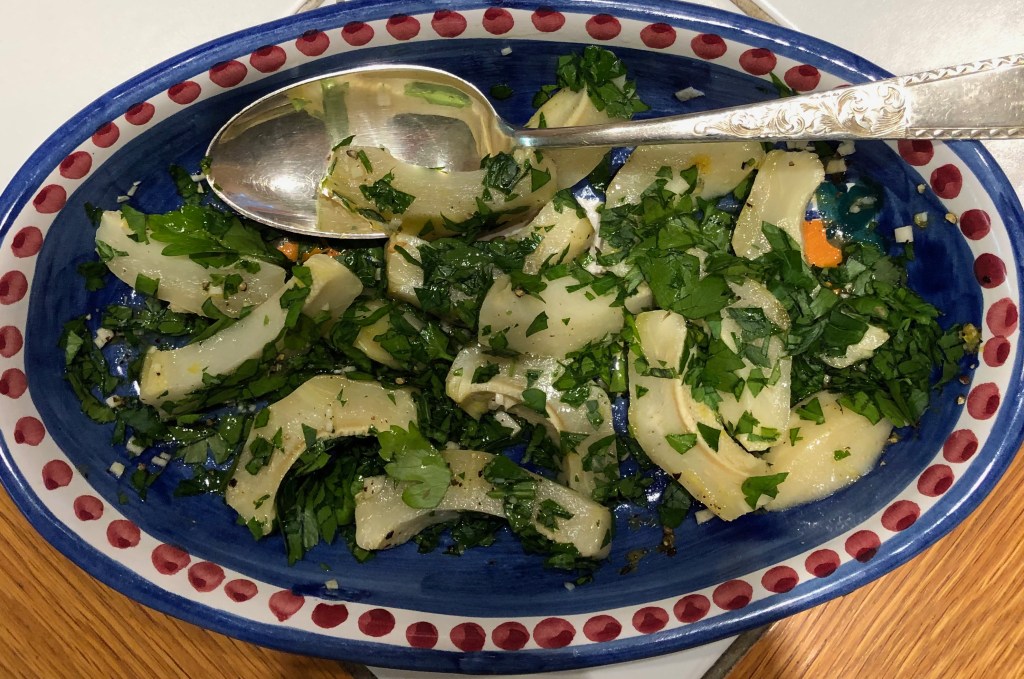
When you have prepped your pan, add the cakes and cook. Flip when you see the sides of the cakes turning white. If you have prepped the pan or if you are using a non-stick skillet, this will be quite easy. Cook the other side and then put aside. Remember, the salmon will cook after it is taken off the pan. Don’t overcook or the cakelets will be dry. Top with some of the chili oil, crisp, or spice of your choice. You will have this.

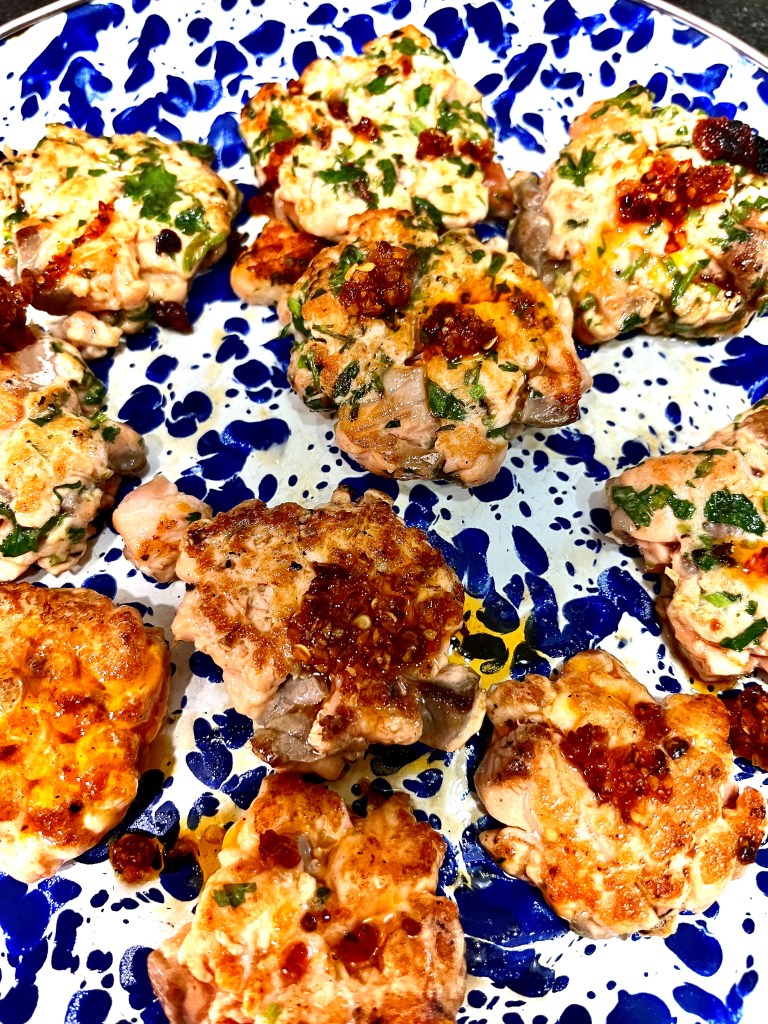
This recipe made 24 cakelets. Needless to say, if you want them larger to put on a salad or into a bun, have at it! BTW, none left. Even the 4 year old took some. But Anna? she love making them, chimed in on what was working in shape and taste, loved the finished flavor and hopefully she will make them on her own.

For everyone else? 🙂

Just in Time for Summer. Zucchini Butter!

No butter needed.

This is a great quick preparation for carnivores, pescatarians, vegetarians and vegans. Gluten free. Dairy free. And in the next month or so, they will be everywhere! Can go on toast, pasta, fish, meat, in eggs….getting the picture? 4 ingredients unless you really want to jazz it up. I bring you ZUCCHINI BUTTER. To make, you will need

Note. One of the ingredients is a piece of equipment. That everyone has. In some way, shape or form.

To make. Grate your zucchini on your box grater using the largest holes. If you want to break out the food processor, just pulse a few times to get the size shown below. Do not over process, you are not making soup, you are making butter. It should be mentioned that any color of zucchini or summer squash can be used. I think, as the product arrives at markets or in stores, the smaller varieties would be better because they are sweeter but do not let lack of small vegetables deter you from making this. Your grated product should look like this.

Chop shallot and add to zucchini bowl. No shallots? Use onion. Use scallion. Use garlic, but sparingly. You want to taste zucchini.

Heat your pan, and after heated, add olive oil. If you are using non stick, add olive oil and heat pan at the same time. Toss in zucchini and shallots, salt and pepper and let cook down. This is halfway through the process.

The water from the zucchini will cook out and the zucchini will soften. The edges may get a bit brown just continue to toss, the whole process will not take more than 15 minutes.

This is the finished product. Allow to cool and you will see that your zucchini has become spreadable, you get it, just like butter! And that’s all there is to it. If it needs more salt, add salt. If you like it a bit more fiery, add red pepper flakes or my favorite Calabrian Chili past. Want basil? Just throw it in. More acidic? A squeeze of lemon. The world is your zucchini!

Now what? Below is the simplest way to use. Toast a piece of bread and spread the butter. Eat.

I made breakfast with some leftover pasta and threw a bit of the butter in the eggs and I give you this.

And there you have it. Keep it in the fridge and remove just before spreading. I hope you enjoy it as much as I do!

PAN TOMATE

A variation on a theme

After spending a wonderful and food filled 10 days in Spain, I find that I am drawn more than ever to small bites. Not that I needed that much in the way of encouragement, but the Spanish seem to have developed the final word on yumminess in small plates. So with that in mind, I give you my spin on Pan Tomate. Normally, Pan Tomate is a piece of toast rubbed with some tomato and topped with something. This is an upgraded riff on that-easy, involves no cooking unless you call toasting bread cooking, only a bit of hands on time (think less than 5 minutes) and can be used in a myriad of ways. Perfect for your next happy hour nibble. What you need are these items:

Notice, two of the 6 items are “utensils”. I had a beefsteak tomato that was sitting unused and decided to employ it for this appetizer. Also shown are salt, bread, and oil. I am using Spanish olive oil, use what you want or what you have. The bread is an olive loaf, again, use what you want or have. For you gluten free folks, substitute the olive bread with your gluten free fave. Grate the tomato on the largest holes of the box grater. It may smush if you have an overly ripe tomato, if that occurs, you can chop down the larger pieces, but by and large the tomato will grate easily and you will end up with this.

Pour your what is now tomato puree into a strainer placed over a bowl , salt lightly, and allow the tomato to drain. Like so.

The more liquid part of the puree will seep into the bowl below and you will be left with a spreadable product. Don’t worry about the seeds. In Spain, I saw seeds everywhere, even in a 2 Michelin Star restaurant surrounded by the gelatin which holds the seeds in place. They are delicious. A bit tangy.

Now the fun part. Take your bread, toast it slightly, and and then “butter it” with the tomato. I will show you two different iterations. The first was part of a tapas dinner on a Sunday night. The second was a breakfast toast with avocado.

In Madrid, they call this a matrimonio. A combination of white and grey anchovies for anchovy lovers. I love anchovies, but admit that there are haters out there. Maybe you should give them another go??

This is tamer. Both were delicious. Topped with a bit of salt and a drizzle of olive oil. Pepper if you want. Parsley or cilantro.

So what else can you use? Top with thinly sliced manchego. Top with tinned tuna or another tinned fish. Top with a slice of sweet onion. You can even top with a fried egg. You are only limited by your imagination!

Now what to do with the tomato water that filtered out. Martini lovers, I am looking at you! Add to some chilled Vodka, skewer a small piece of Mozzarella and a leaf of basil. Not your grandmother’s Caprese!

I hope you make this. Like I said it is so easy to prepare, inexpensive, and so many ways to enjoy!

BROCCOLI

Not just for steaming.

I was testing a recipe for pork spareribs for a Lunar New Year party that we are having in my building. I found the pork recipe I wanted, but as I was making the ribs for dinner, I needed a side veggie to go with the pork and rice. I had some fresh broccoli in the fridge, so that became my side and the inspiration for this post. The good thing about this prep is that the seasonings can be used for a roasted side or a steamed dish. And the ingredients are probably things you have, but I am including some two items that you may want to keep on hand for future use. Both of these items can be stored in the fridge for a bit, so it may make sense to add them to your everyday larder. Or not, you do you.

To prep the broccoli for either steaming or roasting, break down the florets into smaller pieces and peel the stems and cut them into coins. Here I have two small broccoli crowns; you can see the before and after.

If steaming, just add to your steamer and cook to your liking. If roasting, which I prefer, toss with a bit of neutral oil and add to roasting pan. Don’t crowd pan or your broccoli will not crisp up and I like my broccoli with crunchy edges. I set oven to a pretty high heat, 400-425 for about 15 minutes. After that, toss and keep an eye on the pan, burnt isn’t good. Roast to your preferred taste and remove.

To finish the dish, you are ready to season. Simply, toss with lemon juice and chili flakes, salt and pepper to taste. Or you can bougee the dish with these ingredients, and these make a big and tasty difference.

Notice the use by date on the peppers. Once you get accustomed to using these peppers, you will go through them long before the use by date. The preserved lemons are a pickle by another name and last for a long time as well. See sentence regarding peppers and repeat.

With both of these ingredients, a little goes a long way so taste as you go. The peppers have a bit of a kick and the lemons are salty. A scant 1/2 teaspoon of the peppers will suffice for the amount of broccoli shown if you want just a bit of heat. The lemons are soft, again I use scant 1/2 teaspoon to start and toss with chilis and broccoli and taste for seasoning. That’s it. Either dish can be served hot, at room temp, or chilled for a salad. If taking from fridge, remove about 10 minutes before serving to let the flavors come back to life.

Want another idea on how to use? Crostini. Toast some bread, rub with a clove of garlic, chop the broccoli a bit finer, and top the toast. Drizzle a bit of olive oil to complete the dish. Serve with a glass of red wine. Enjoy!

Roasted Rapini

It is a beautiful Saturday here in quarantined Brooklyn. Totally Spring. And in a sign that some normalcy is trying to return, my dry cleaner was opened so I was able to ransom garments that I dropped off a month ago, like having a new wardrobe. Our Greenmarket is open on Saturdays as well, so I walked up to see if anything was available. Lo and behold, green things are starting to appear as nature does its thing with or without face masks.

One of the vendors had beautiful bunches of broccoli rabe and for the first time in 6 weeks I had a craving for something that wasn’t a potato chip or a bottle of wine. This has to be the easiest, freshest, and tastiest thing to make on the spur of the moment.

aren’t they beautiful?

So before you I have presented the ingredients. Rapini (or broccoli rabe), garlic, crushed red pepper. You will also need olive oil and flaky sea salt to taste. Everything is QB (quanta basta, or as much as you need or want). First blanch the rapini in boiling water for about 5 minutes. This will soften the stems. Refresh in ice water and drain. Heat oven to 400 degrees. While oven is heating, slice the garlic as thinly as you can. Cover a rimmed sheet pan with aluminum foil (read easy cleanup) and place the rapini on the pan alternating stems and tops for even cooking. If necessary, use two pans, you don’t want to crowd the pan. Add the olive oil, the shaved garlic, the crushed red pepper, salt to taste, and toss. Roast 10-15 minutes. That is all there is to it. If the stems are still tough, cut them from the tops, and place back into oven covered with some aluminum foil to finish. Add lemon juice if you want, or a splash of red wine vinegar. That’s the healthy part.

When I was growing up, my grandmother would make me a sandwich on our Sunday visits. Kaiser roll, some pork cracklings from the rendered fat back used to fry the meatballs for Sunday gravy, and some broccoli rabe. As I was roasting the rapini, I thought of that dish. I had some bacon in the fridge which I chopped down into small pieces and fried. Dipped a Martin’s potato roll into some of the bacon fat, added a few pieces of crispy bacon, a few slices of shaved pecorino cheese, some of the garlic slices from the rapini and toasted my grandmother. Not so healthy, but oh so delicious.

Other things you can do: chop it, add some of the cooking oil and bacon and toss with pasta; top with fried egg; serve at room temperature as a side or salad adding some lemon zest; chop and add to omelettes.

So grab your mask, go for a walk, enjoy the day, look for the rapini, and be grateful for another spring.

Braised Radishes

This is a riff on that beautiful appetizer seen so often in the South of France. If you have ever been, you will know that radishes are served with fresh butter and flaky salt (and a bottle or two of Rose’).

I was looking for a different side vegetable for my Easter dinner, and I had some radishes in the fridge which were a bit tired looking, so I decided to reinvent that appetizer to serve as a vegetable for my meal. 4 ingredients including the water and the salt. The other two are radishes and butter. The whole process start to finish takes 10 minutes max. The result is a colorful and sweet vegetable that will surprise even the pickiest of eaters (read my husband).

Start with clean, clean, clean radishes. They are always very dirty when you purchase them, rinse them in several changes of cold water to remove the grit. Remove the greens and set aside. I like to leave the little squiggle things at the end and a bit of the green stem, but you can remove as you like. Try to keep them all the same size, if need be leave some whole and some sliced. It will make the cooking more even. Place your radishes in a sauce pan that has a lid, add butter (depending on how many radishes and how much you like butter, this is a very free flowing recipe) and a 2-3 tablespoons of water. Cover and bring to simmer over medium heat. When the radishes are softened so that a knife or cake tester goes through with some resistance, remove the cover and raise the heat to boil. The water will boil away and leave only the melted butter which will cause the radishes to brown. When finished, remove from pan, sprinkle with flaky sea salt and serve. That’s it. If you really want to go over the top, and you happen to have it on hand, you can replace the butter with either chicken or bacon fat, or my personal favorite, duck fat which I always have in the fridge because, well you never know when you want duck fat potatoes. Photo start to finish below.

Now about the greens. They can be served with a simple red red wine vinaigrette as a green along with the radishes and your meal. Or you can puree them with some walnuts and olive oil, a bit of red pepper flakes and a clove of garlic and make a sauce. Use them, they are tasty, peppery and a bit like arugula.

One more thing, don’t forget the Rose’.

Venetian Memory

The fog on the vialetti. Le piazze piccole. The flying domes of San Marco. The bridges that go to and fro and take you to places that seem to be in the middle of nowhere, and are. All beautiful memories of Venice, especially in my favorite season, winter. But nothing captures my memory more than the food I ate on my many trips. Not in the Piazza San Marco, not the high end ristoranti, but in the alleyways behind the Rialto Bridge, the bacari in Cannareggio and San Paolo, that food. The food the locals ate.

On one of my trips, while drooling my way through the Rialto Market, I happened upon a merchant who was spinning artichokes to uncover the hearts. I have seen this done on a myriad of TV cooking shows, but never IRL. It amazed me that this could be done so quickly because every time I tried to follow the YouTube videos and reruns of Cooking with Lidia to perfect the trick, it turned out to be a lose lose proposition. This person was cleaning and dropping them into lemon water faster than you could spell artichoke. Shaking my head sadly, I just walked away.

Fast forward to dinner. In Trattoria La Madonna (a must if you ever visit Venice), just behind the aforementioned bridge, I saw warm artichoke salad on the menu and decided to order it. Thinking I was going to get grandma’s artichoke which is eaten leaf by leaf, the kind server placed before me a beautiful, warm salad of cleaned and sliced hearts. I had never eaten artichokes this way. These were same hearts I saw being dropped into the water earlier. It was delicious.

I bring you this salad. If you have frozen choke hearts, which is what I use, it is easy and tasty and if you like artichoke hearts, good for lunch or dinner every day of the week. This is what you need.

Frozen artichoke hearts are available in almost every supermarket. I buy mine from Sahadi’s, a Middle Eastern market in my neighborhood. To serve 2 people as a salad or a side, cook 4 hearts in boiling salted water until they are soft when pierced with the tip of a knife. I use a cake tester. If it goes all the way through with the smallest bit of resistance, they are done. While they are cooking, chop a 1/2 clove of garlic (or more if you like) and a big handful of parsley leaves. Zest a half of lemon and squeeze the juice into your serving dish. Add salt and pepper to taste and then add the garlic. When chokes are done, remove from water and drain and dry well. You want to remove as much of the water as possible so it does not dilute the dressing.

Slice them to the desired thickness and while warm, toss them into the serving dish with the lemon juice mixture. Add olive oil to your taste, and top and toss all with chopped parsley. The appetizer/salad/side can be served warm or at room temperature. I did not add crushed red pepper here, but feel free to do so if you want a bit of kick.

And there you have it. It isn’t a visit to the Rialto Bridge, but it sure can conjure up some good foodie memories.